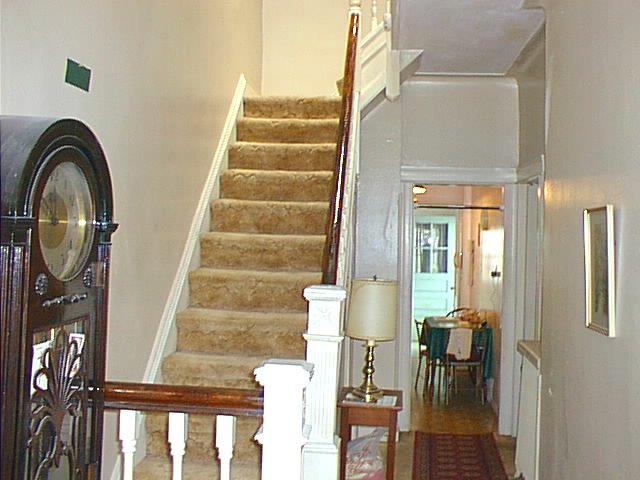
Inspection day. The plaster was being held together by gobs of a weird enamel drip paint. The stairway was covered in cheap latex. There had been a flood in this house — a toilet which overflowed for three days, I’m told — so the old parquet floors popped. There was only one electrical outlet in this section of the house.
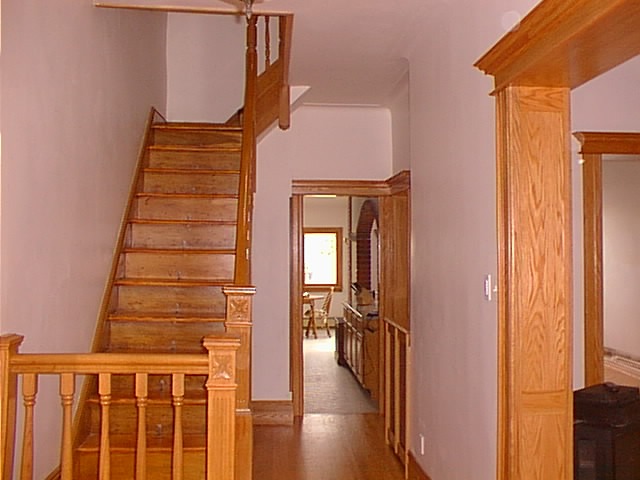
Three years later. There’s about 200 feet of mesh tape in the walls and lots of new plaster. All of the walls in this shot were skimcoated using a nifty device I found on the web, Magic Trowel. Several new electrical outlets were added along with a central vac port, visible at the lower right. Besides the staircase, which is about 50% renovation, all of the woodwork in this picture is new. The old stuff was beyond salvage.
For details about the stair renovation, see The Staircase.
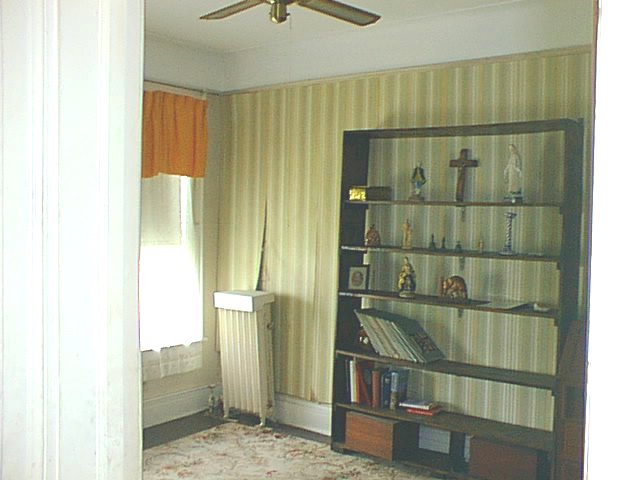
The Office
Evidently, the chapel.
Now, it’s my home office. Actually, all that was done here was to refinish the floor, patch, prime and hang some shelves. I got this room to this state a week after I moved in.
Since this picture was taken the room has been renovated yet again. It’s now my guest room.
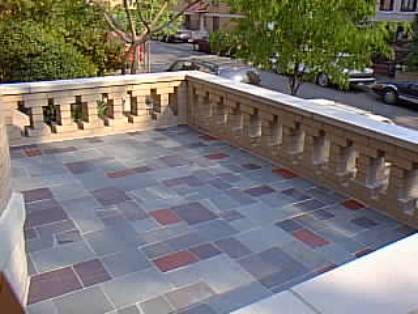
Garage roof/living room deck
The original living room deck/garage roof. Besides bad leaks from a shoddy concrete job, which actually sloped away from the drain, the low railing was a trip hazard and code violation. That’s probably why the door from the living room was siliconed shut. I recycled that railing for the backyard garden.
The old roof was removed, new steel and lintels were added and eight inches of concrete was poured with a rubber membrane in the sandwich. Frank O’Donnell was the GC for this work; it was definitely not a one man job. The brick was matched to the existing house and laid by Jim Lally of Galway Bay Masonry. I did the slate.
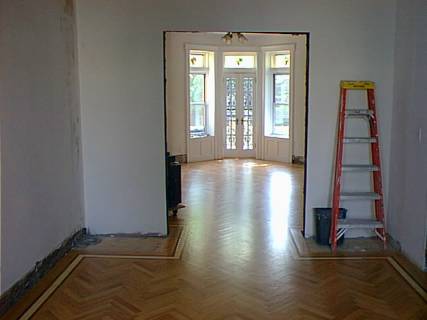
Living room
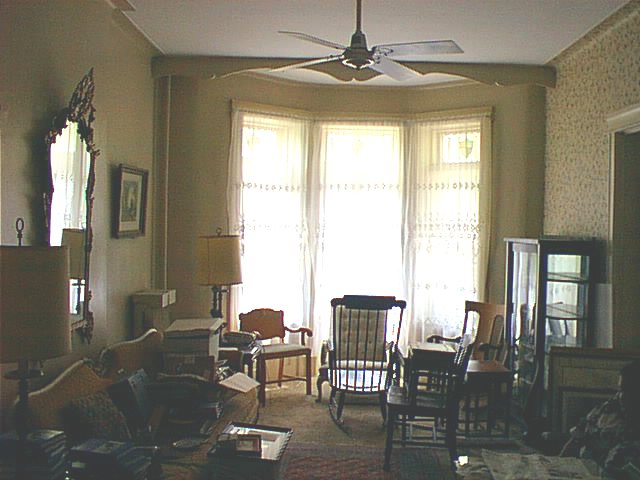
There were only two electrical outlets in the room, the parquet floors were gone, the ceiling fan was hanging on two drywall screws sunk into plaster lathe (scarey!) and the woodwork was too destroyed to renovate. The oak pocket doors were gone, replaced by a cheezy house trailer sliding divider. Go figure. Sometimes I think that people should have to be licensed to own a house over 30 years old.
After an unsuccessful attempt at stripping, I rebuilt the bay window unit with red oak. To replace the old panels beneath the windows, I built open cabinets with low voltage lighting. They may get stained glass doors later. I also replaced the old radiator with a cast-iron baseboard unit and built a red oak enclosure for it, mostly out of leftover flooring.
There’s another 200-300 feet of plaster mesh tape and plaster washers sunk in these walls and in the water-damaged ceiling. Cutting the angles on the crown moulding over the windows was the trickiest part. As I recall, they were 23-1/2 and 22 degrees, respectively. I made a lot of practice cuts before slicing into the eight-buck/foot crown moulding.
Office #2
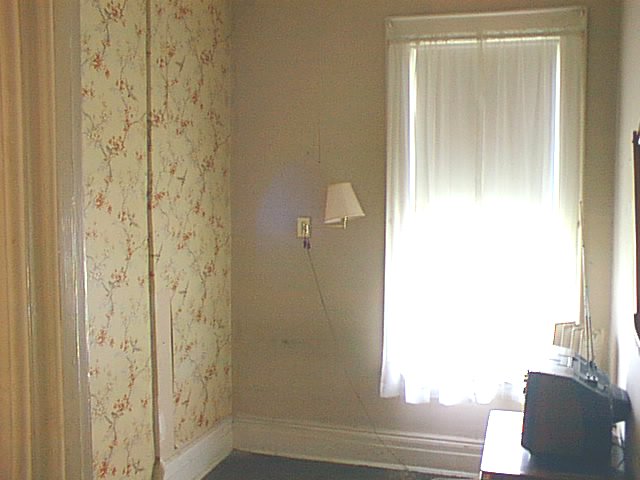
Inspection day. This was a weird little room. It had a false wall built from street salvaged material and spray foam insulation, the latter of which was a bitch to remove. A neighbor told me that the resident of this room was deathly afraid of mice, although I’ve seen no evidence of rodents in the house.
After renovation. This was actually my second office, having moved it from the larger bedroom next door. There’s nothing special to it. I replaced all the trim and laid down a Mannington engineered oak floor.
Some random renovation shots
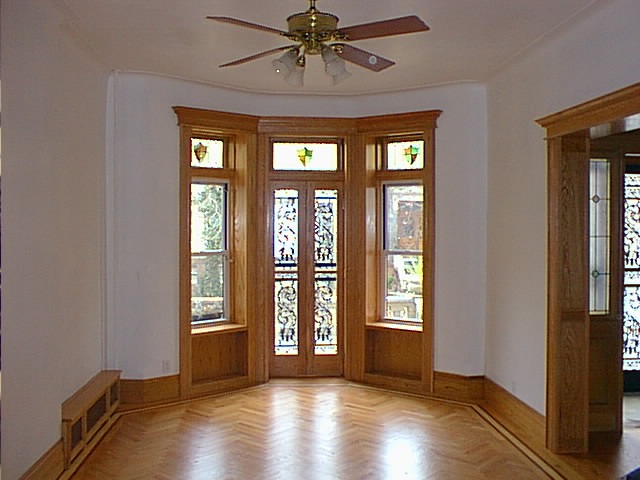
Joyce Lariviere did this stripping too but there’s a lot of new work here. The challenge was trying to make the new blend in with the old. The staircase balisters, newel post caps, casements around the living room entrance and crown mouldings are all new, as are the wrought iron exterior doors. The mudroom entrance floor will get a marble medallion.
The new herringbone red oak floors are down with one coat of poly to go. Before that happens though I have to build a couple of china cabinets, which will go on either side of the doorway, and do the trim. I’m not exactly sure at this point what I want for this room. The original house had oak plate rail and decorative pressboard inside rail/stile paneling and gingerbread over the doorway. It was pretty nice. I may try to recreate that later.
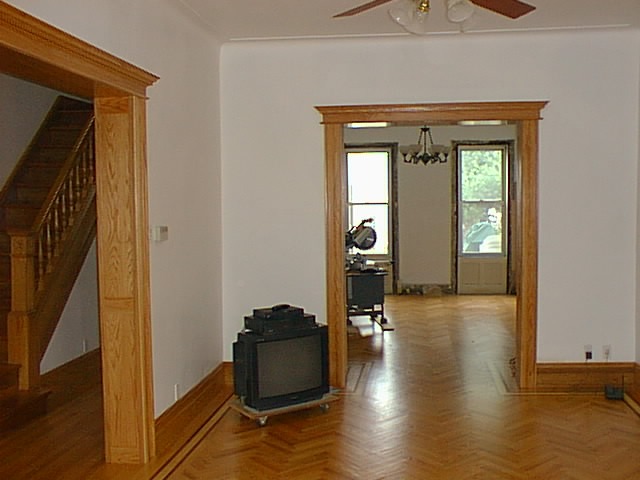
When I vacated my loft, I decided to leave most of my furniture behind. This was all the living room furniture I took: a 15 year-old TV and a dolly.
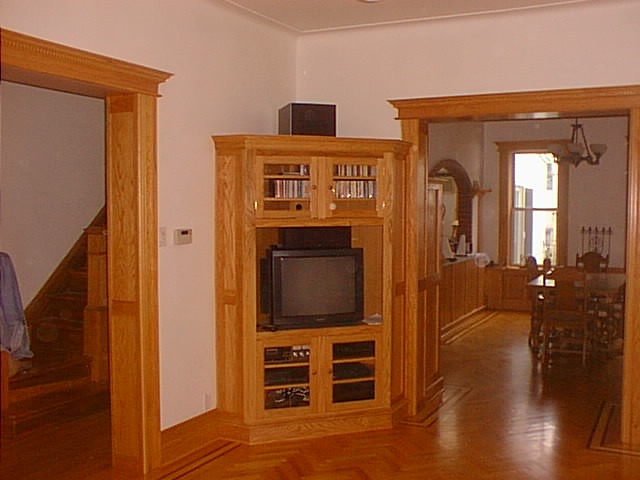
Okay, the sequences are confusing but I lied on the Dining Room page. I decided I needed one last built-in after all: a media center. This was after coming to the realization that my original idea to make one of those dining room cabinets a media center was dumb, if only because it was in the wrong room for a home theatre system. So it was back to the shop to build this. I still need to construct the glass door panels.
That entertainment center was a troublesome piece to build. For one thing, it was too large to make it out of my basement shop’s door. It’s six-sided and I could only construct the back three sides in the shop. It was carried upstairs and constructed in place. I thought that this was going to be my first major disaster.
My recording studio construction background came in handy here. I didn’t want speakers cluttering the small living room but I also wanted something with a hefty midrange you can only get from a large driver. So I bought a pair of Polk in-walls and pulled Monster cable across the basement ceiling and up inside the walls. You can see one of the in-walls next to the dining room entrance.
A Polk subwoofer sits on top of the cabinet (I have to find a way to hide that better) and there’s a center channel speaker inside the cabinet, everything driven by a Denon seven-channel receiver. The dining room also got a pair of slaves (Polk, of course). I have to say the system sounds freakin’ amazing!
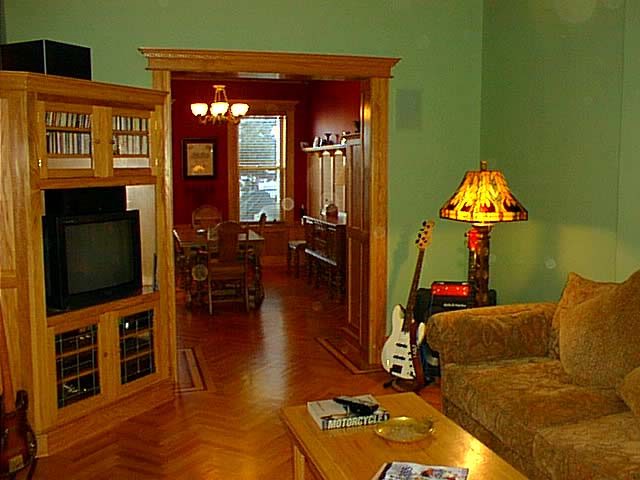
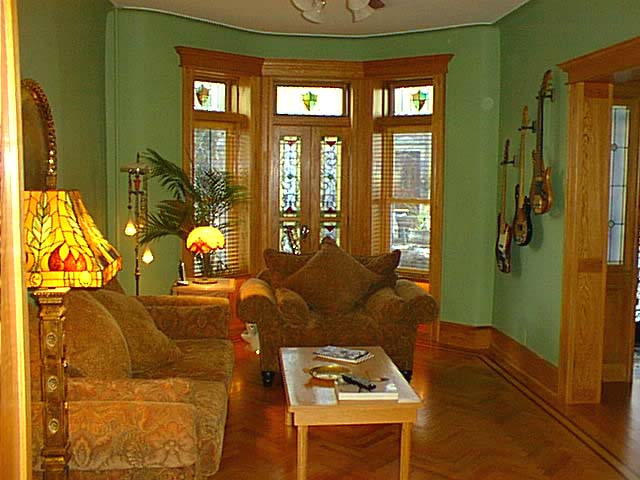
Finally, paint and furnishings! The green paint looks a little, I dunno, electric in this shot. It’s another cheap digital camera trick. I built the coffee table and end table too, using some real nice quarter-sawn oak I found in the Bronx. The former has a hidden tray in front to stash the various remotes. One problem: Chopper is already starting to tear apart those tapestry sofas.
Entry floor
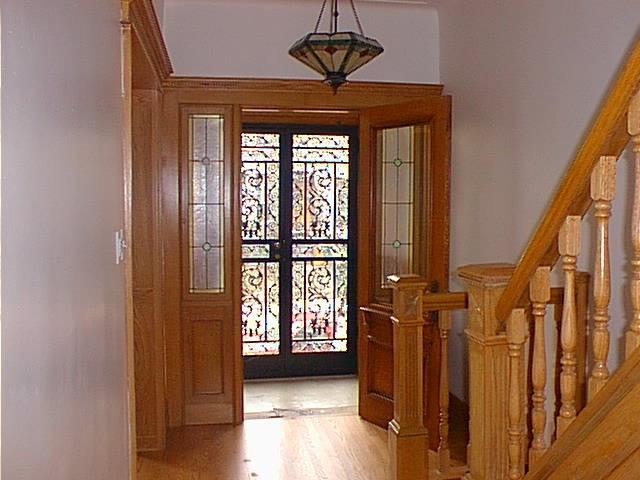
The entryway/foyer floor was the final first-floor eyesore so I was anxious to get this out of the way. The problem was cost. I wanted a marble medallion but I couldn’t find anything decent for less than five-hundred bucks. Then I decided to check the web, where I found an eBay store that specializes in them. This cost $139 so I grabbed it and finished off the field with green tumbled marble and ivory marble mosaics.
But before I did that I had to replace the concrete subfloor, which was crumbling due to a badly-placed air valve in the basement that was blowing super-heated steam underneath. I relocated it above the floor (you can see it in the upper left corner). A wet saw is mandatory for stone tile and cuts like this.
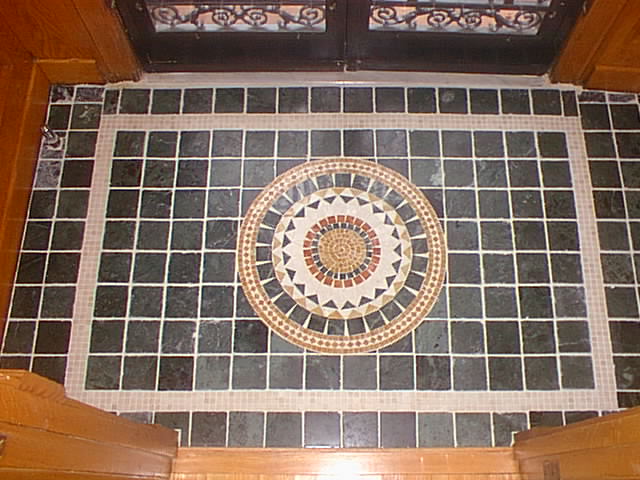
View from the living room. From a distance it looks like the presidential seal. The key to tile applications like this is lots and lots of layout. I used up half a pencil drawing quadrants, lines and circles on the rough concrete. I also made a masonite template of the medallion for the tile cuts. Polished marble tile in the field would have prevented that wide, ragged grout line but that would have meant a dangerously slippery floor inside the main entrance.
Stained glass construction
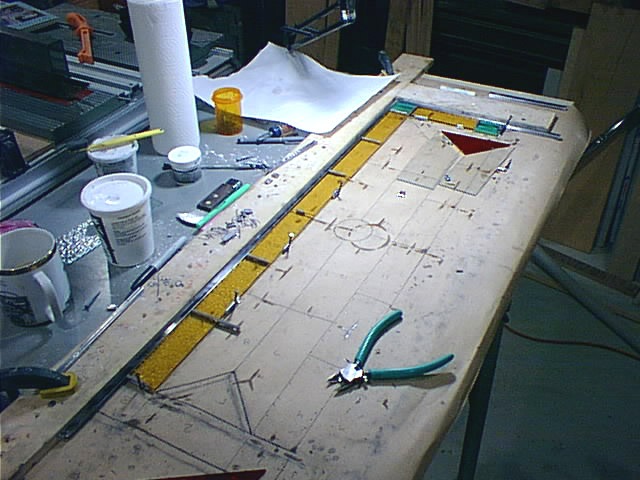
The layout. The design incorporates elements in the existing living room transom and entryway sidelight windows. My table saw extension is the layout table.
Laying out stained glass is a bit like building a jig saw puzzle. Tight fits are important because stained glass is basically just a broken window repaired with lead cane. Gaps between cane joints or cane and glass will be weak points later.
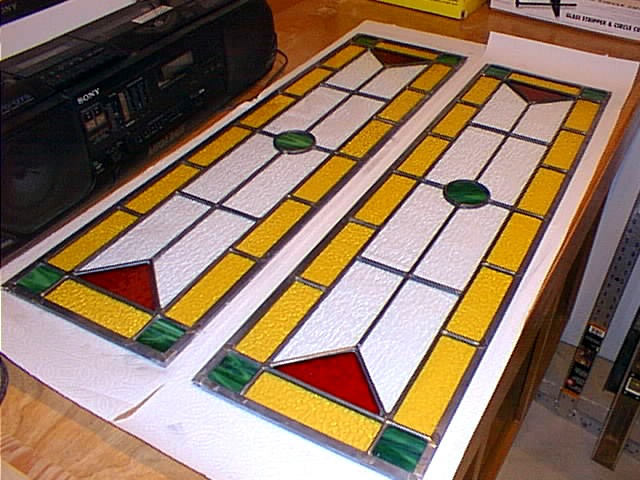
Two down, two to go. The panels are puttied and polished and have to lay flat for three days to cure. So do I occasionally.
The stained glass panels are installed in the living room french doors. Unfortunately, the ornate wrought iron doors behind it kind of obliterate the glass with the low winter sunlight beating on them.
Scroll to Top
Welcome to Brooklyn Row House
This blog is about the challenges of renovating an old (1903) Brooklyn, New York row house.
My last major renovation project was the master bedroom, most of which is about finish carpentry. You’ll find other completed home improvement projects in the Projects submenu at the top of this page.
I’m not a professional builder and don’t pretend to be. I’m just an experienced amateur raised in a family of committed DIYers. I try to closely follow local and national building codes but don’t mistake anything on this site to be professional or even accurate advice! Your mileage may and definitely will vary.
This is the third iteration of BrooklynRowHouse.com, from scratch-built to Drupal and now Wordpress. I hope you enjoy your time here.