Inspection Day: The Master Bathroom
The bathroom project started in May 2004, five years after I bought the place. This is Stage One in the second floor renovation. That’s how long it’s taken me to finish more pressing projects elsewhere in the house.
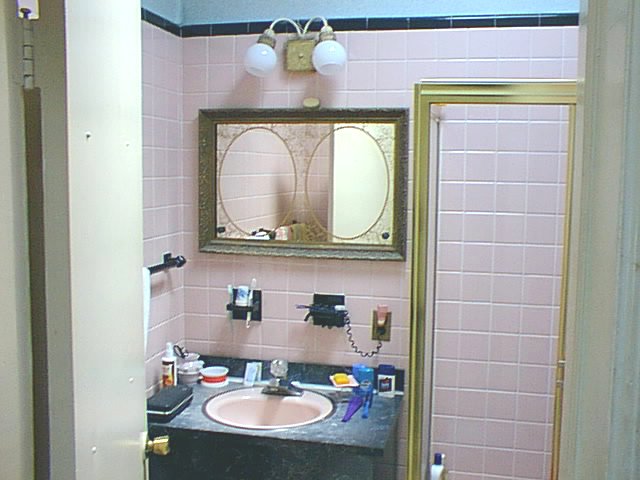
It’s a 1950s bathroom, but demolition revealed that it was probably its third renovation. Fifty years was long enough. Time for a facelift.
Lovely color scheme, eh?
Let's get to work...
I was originally going to tackle this job myself but I had several reasons for bringing in my favorite general contractor, Frank O’Donnell, for the demolition and rough-in work. Mainly, I couldn’t live without a functioning upstairs bath for the probably four or five months it would have taken me to get it functional again. My other bathroom is two stories down.
It’s also one those “a man’s gotta know his limitations” things. The job required moving a potential load-bearing wall. There were tons of debris and materials to be moved in and out over newly finished floors. The bathroom sits over the heavy oak ceiling I built two years ago, on a concrete floor that needed to be broken up with a sledge hammer. It involved breaking/repairing the roofline for a new vent and exhaust and tapping into old, brittle cast iron plumbing. The second floor needed an electrical subpanel and, while I’m pretty good with electrical, I shy away from heavy amperage. Frank has also installed dozens of Jacuzzis and steam rooms, and any DIYer who’s installed a Jacuzzi knows what I’m talking about.

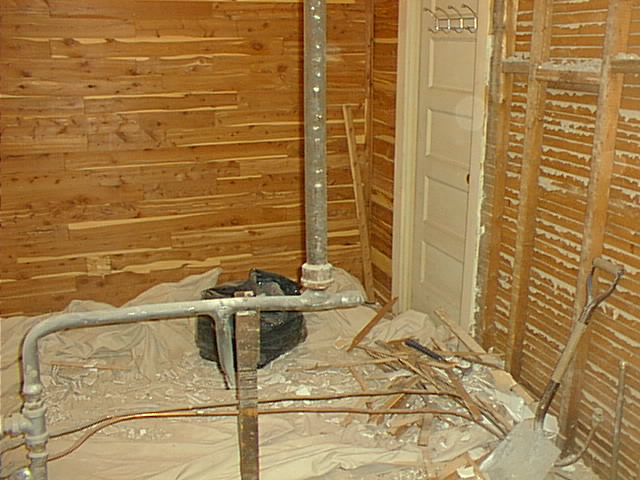
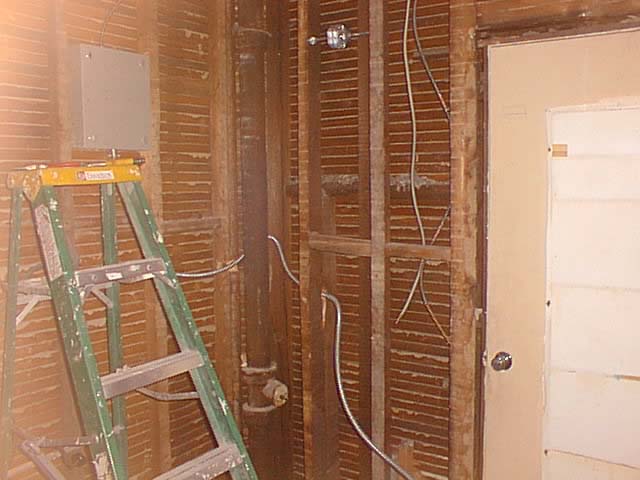
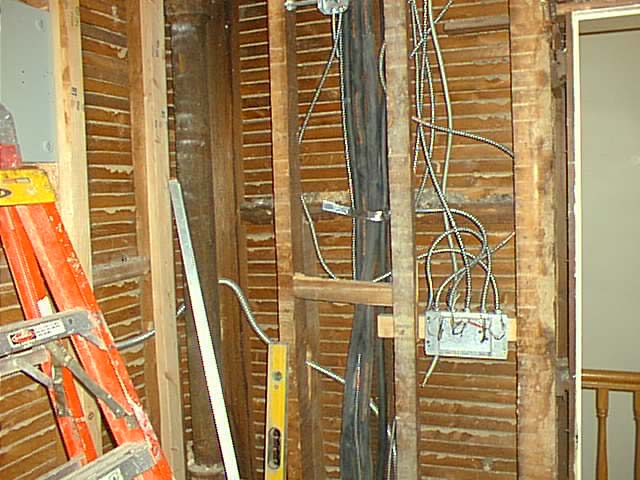
Day #2: Most of the demolition was completed and the debris carted away, including removal of the rear wall separating the old bath from a walk-through closet. A new wall will be constructed to make the bath about two feet deeper to accomodate the oversized Jacuzzi tub.
It looks like, many decades ago, there was another sink on the second floor. But the old branch was just crimped closed, not sealed. That explains the occasional sewer smells in the old bathroom on hot days.
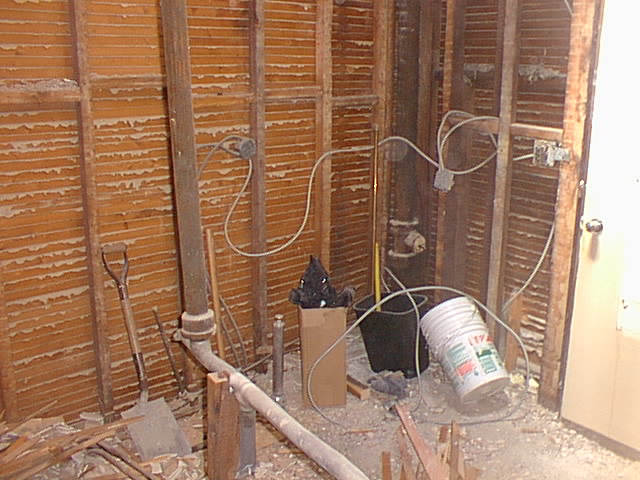
Very scary, old aluminum wiring. Well, it’s gone. A new 50-amp subpanel will be installed next week to accomodate the second floor rewiring.
Day #3: The old wiring has been removed. The subpanel was installed and #6 BX cable pulled from the basement. A couple of ceiling can lights and sconces are in place.
I have to make the decision today on whether or not to go ahead with the installation of central air-conditioning. It will be far cheaper to do the second floor at this stage while the walls are still open. I want to use a ductless system. These units are quieter and more efficient than window units but don’t require expensive, ugly a/c ducts. Frank says he can get the second floor installed, with heads but minus the outside condensor unit, for $2600. I wanted to push this expense off till next summer but i think i’m going to do it.
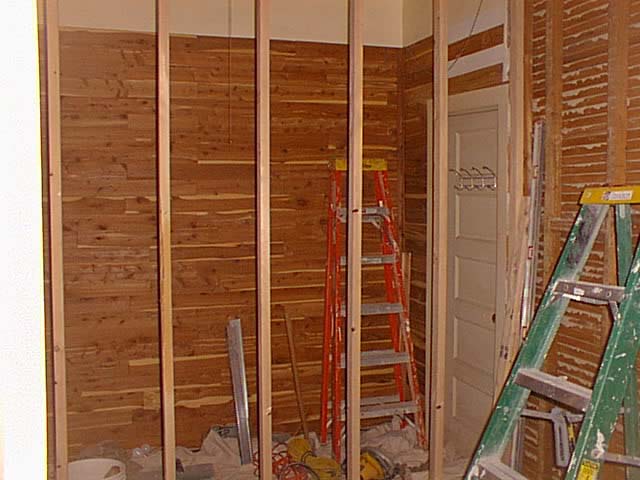
Day #5: The new back wall is framed. And we ran into a problem.
The 36-inch wide Jacuzzi was going to move the toilet to a position that would have required cutting through two floor joists to accomodate its 4-inch drain. Frank recommended against it. Karen found the solution. The tub will lay flat against the new back wall, vanity on the left wall, toilet to the right of the entrance door. That makes the plumbing a lot easier and her plan incorporates cabinets that make use of dead space in the old design.
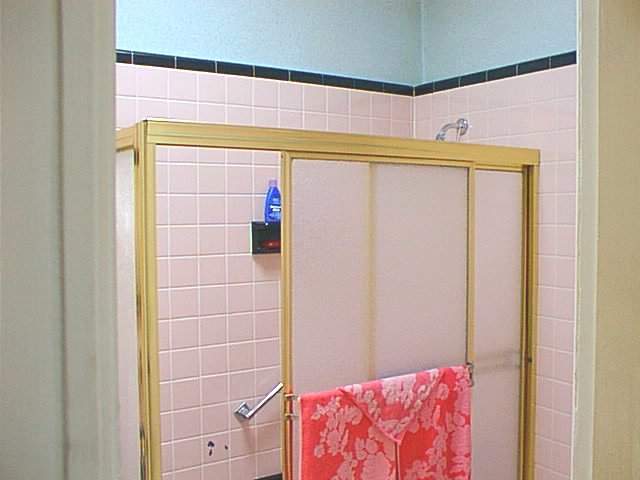
Tenement shot. Maybe the old bathroom wasn’t so bad after all.
Drains and vents are almost done. If I was doing this by myself I would have used PVC for all of it but Frank is old school about cast iron/no hub drains. On the other hand, cast iron is quieter and did I really want to be eating in the dining room and hear a toilet flushing over my head?
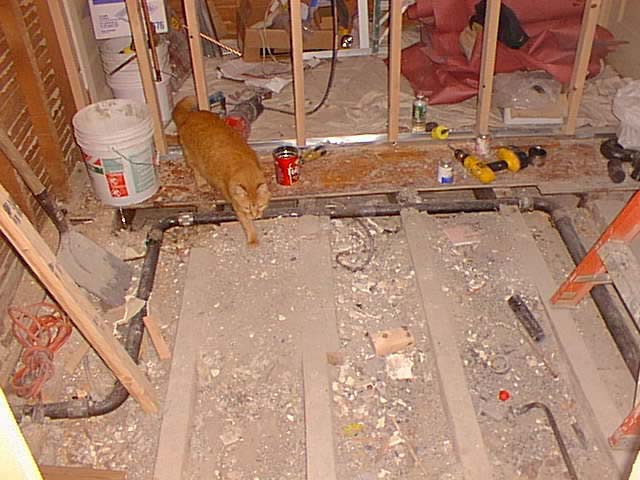
That’s Chopper inspecting what he thinks might be his new litter pan.
The interesting thing in this shot is the new run for the upstairs central air conditioning, inside those black rubber insulators. It runs two stories down to the basement, across the ceiling soffit and out to the back yard under the deck. I couldn’t believe how fast Dimitri’s crew worked. All were native Russians and none spoke a word of English so we communicated with hand signals. Come to think of it, all the workers are either Russian or first-generation Irish.
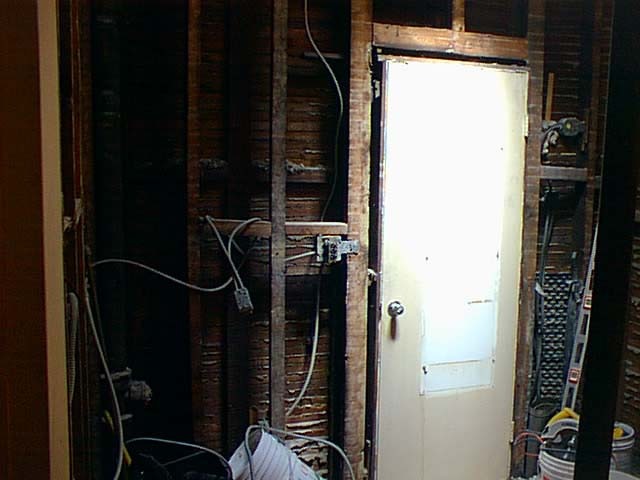
That big box with all the wires in it is the switch panel for three of the four lighting circuits and the exhaust fan. I definitely have to clean up that rat’s nest before close in.
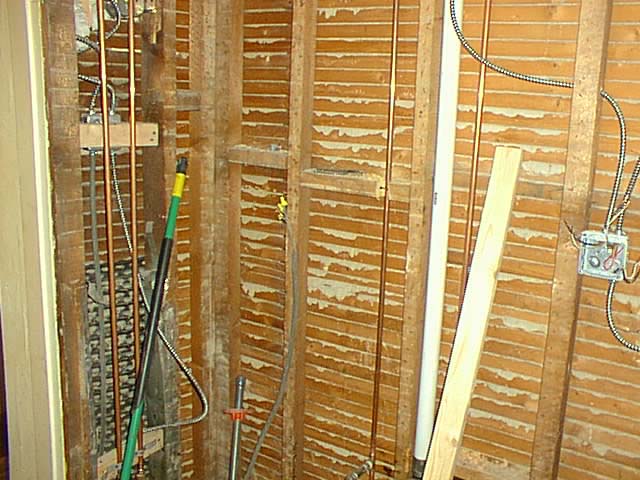
In the photo are the new copper runs from the basement as well as the PVC vent and GFCI outlet for the vanity. Frank’s contract stops at hanging the drywall and laying the mud floor, which is when I take over. I’ll be doing the taping too because I will probably need to remove drywall to make adjustments for sconces and outlets. In fact, I know I will.

Day Six: There was lots of visible progress today and, as always, it’s with mixed impressions. On the one hand, drywall hides all the internal funk and begins to show what the finished room will look like. On the other, it always looks a lot smaller than you thought it would. This is no different.

Rocking done. That dangling wire is the low-voltage power switch for the steam unit.
About that tub: arrrrgh!! And here I am trying to get rid of a pink bathroom. This tub was supposed to be deep red, like a burgundy!
Let this be a lesson to online buyers. I’m a professional web developer so I have no excuse. I already know that web colors can’t be trusted and I should have paid more attention to the site’s color samples. If I had I would have noticed that they were GIFs, not JPEGs, which are very unreliable indicators of real-world colors.
There was a $400 restocking fee and eight week turnaround on returns so I’m stuck with it. I’m going to have to find some way to de-pinkify this bathroom, possibly by using grey-scale natural stone in the tile surround.
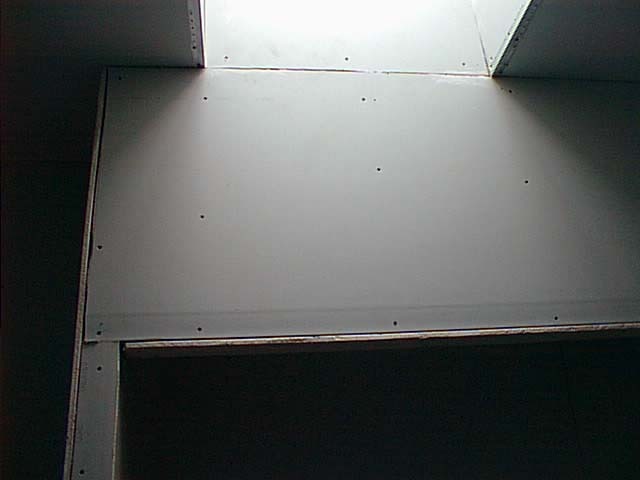
The digital camera’s aperture got confused by the brightness of that skylight. During the day, that skylight brings in enough sun that you don’t even need artificial lighting in here. It still needs a glass panel to seal off the shaft though because the skylight is vented.
Frank’s job is done. Finishing up the bath is on me from here on.
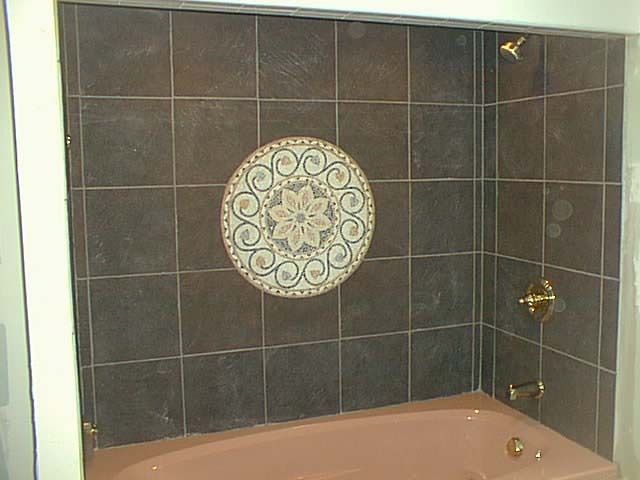
Shower surround tiling and grouting completed. I need to wait another day for the grout to cure before scrubbing off the last of the grout residue. The marble medallion is something I found on Ebay for ~$200. I wanted a greyish, natural stone field tile to offset the unexpectedly pink tub.
This was the hardest tiling job I’ve done, mainly because of that <expletive> grey tile. Actually, it’s a 3/8″ ceramic floor tile that I got cheap as a contractors return. But I’ve never encountered anything as indestructible as this stuff. I wanted to keep the grout lines evenly spaced around the surround but the tile was impervious to a carbide tile bit. I moved the vertical grout line so I could use my diamond wet saw to cut for the fixtures.
Frank dropped by to check my progress and turned me on to a way I could have done this without moving that grout line: with a hand grinder loaded with a diamond blade. You do a plunge cut from the back. I tried it on the vanity tile later and it worked great.
The Jacuzzi tub works fine but the steam unit only pumps a stream of warm water out the nozzle. Jacuzzi’s sending me a new PC board.
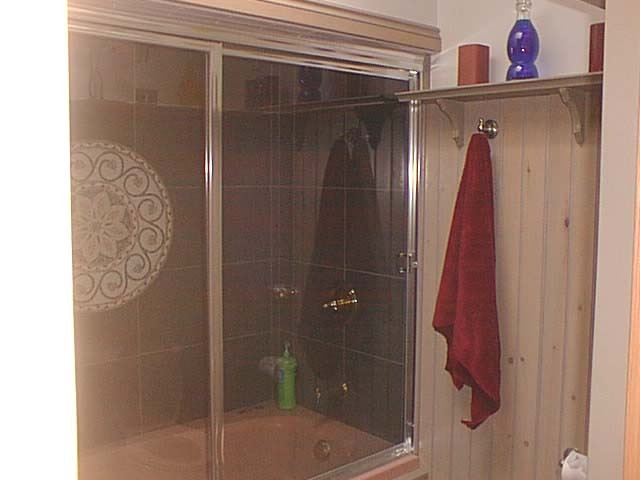
Shower doors and trim installed. Here’s a good example of scrounging on the cheap. It’s typical for a Jacuzzi like this to be installed with a marble ledge under the front lip of the tub. It has to be waterproof so it can’t be wood. But I didn’t want to introduce another texure/color to the bath or pay $150 for something I didn’t want. Solution: Trex decking. After a little cutting and planing, it looks like it’s part of the removable beadboard panel underneath. Cost: $12.
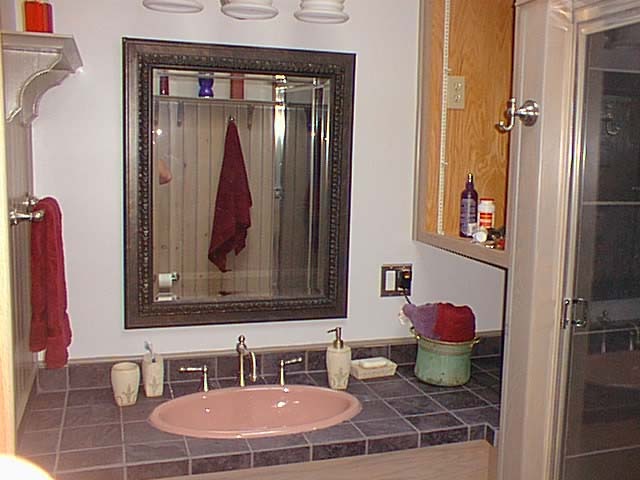
I found Kohler fixtures to match the Jacuzzi. I added a slate counter top to match the floor and shower surround. There are four separate lighting circuits in this small room. To do: raised panel cabinet doors.
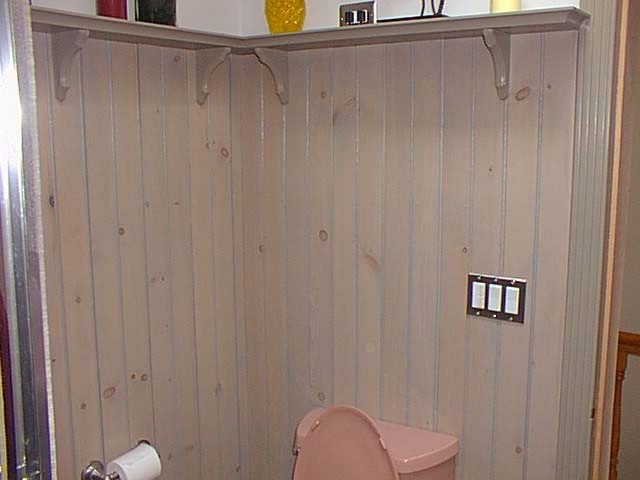
Beadboard paneling. I went back/forth on what style to use and settled on this, mainly because it was the only solid one-by stock I could find locally. I whitewashed it, adding a tube of burnt umber stain per quart to get the grey I wanted, followed by four coats of water-based poly. I capped it with a poplar shelf which has a low-voltage light strip for up lighting through those decanters filled with colored water. Looks excellent at night.
Post Mortem
The Loo almost became my Waterloo. It was a painful lesson in project planning, or lack thereof, and in false economy. Sometimes spending more costs you less.
It’s also an example of not questioning your dumb assumptions. For instance, I thought lounging in a warm Jacuzzi would be a treat. I should have known I wouldn’t like a Jacuzzi any better than my friends’ hot tubs. In face, I don’t like baths, just showers.
The original plan was for a door-less/curtain-less walk-in shower in the rear left corner, where the whole bathroom floor would essentially be a tiled shower pan. It was inspired by a European bath I saw on one of the home shows. Then someone said, “Hey, Steve. Buyers want tubs for their kids!” I should have said, “So sit the kid in a tiny chair and spray ’em down!”
There were a few derailments during the initial construction, like the last-minute bathroom fixture rearrangement. In the heat of battle I made a decision which I didn’t think through and it had implications on things like the entry door, which now swings into the vanity. It also required a change in the vanity design to something more compact, which sucked because I had already started building a nice cabinet with carved Queen Anne legs. It also resulted in a smaller bathroom than I wanted.
In retrospect, I think the original fixture layout would have worked fine if the toilet were placed on a six-inch platform and the drain wrapped around the wall behind the tub. I think it would have looked pretty cool too. A real throne! If I hadn’t been on a contractor’s clock I would have done it that way too. DIY gives you time to develop alternative plans to these in-progress setbacks.
Another problem was the tile I had chosen for the shower wall. I got a bargain on it because I found a contractor’s return at a liquidator. The reason is was so hard to work with is because it was intended for high-traffic lobbies and shopping malls. But when I later wanted to use the same tile on the floor I found that I’d bought the last Zirconia Radica Negro in NYC. That meant a day searching tile stores for an acceptable substitute, which cost three times as much and didn’t come in 14×14. And it had to be special ordered. Add another week and another red check to the budget.
But by far the biggest derailment was that ugly tub color. I hate pink! To make matters even worse, Jacuzzi stopped carrying that color last year which is why I got it cheap. I’d assumed that Jacuzzi sold matching lavs and toilets so I pushed off ordering them until I started the job. I was wrong. I found an acceptably matching color from Kohler called Wild Rose. But, you guessed it: very expensive and special order, almost wiping out the money I saved by buying that close-out tub. It cost a six-week delay in completion too.
I’m hoping that pink makes a bathroom fashion comeback by the time I sell this place!
My bathroom wasn’t completed until mid-August. That’s how ten-minute decisions postponed can swell into two month delays.
Then there are those glass shower doors. I way under-budgeted for those. I’d assumed $700 or so, without doing any actual homework of course. They wound up costing more than twice that, and some of the estimates were double even that! Because it’s a steam shower the doors had to be custom fabricated with special seals.
The final irony is that I had never tried a whirlpool tub before I bought the Jacuzzi. It really wasn’t worth the expense and effort. I don’t even like baths. I would have been happier with a large, walk-in shower.
Neither was the steam shower where, once again, I cheaped out and bought a 110 volt model. I don’t know why Jacuzzi even sells such a limp device.It generates about the same amount of steam as a tea kettle. I should have gone 220v. I could, if I wanted to, buy a 220v unit and reuse the existing #12 wiring and add a two-pole breaker to the new subpanel. But sometimes you just have to surrender to misfortune and move on. I’m done with this bath.
Overall, I’m not happy with how the bathroom turned out. It fell way short of my expectations.