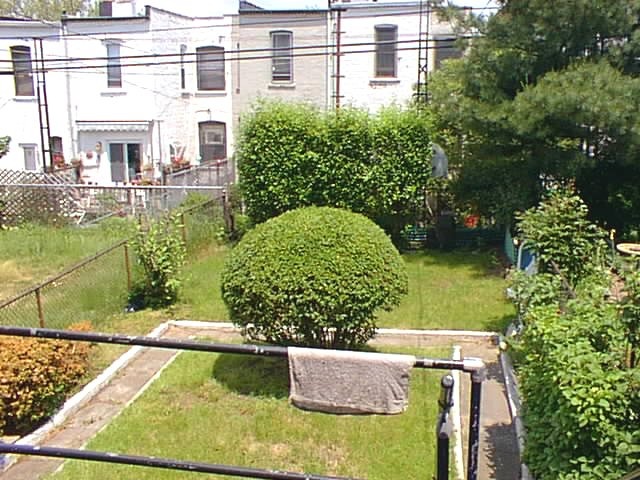
The back yard wasn’t too bad in comparison to the house but it had problems. The poplars in back were infested by a several termite colonies, which had attacked the house. The cement path to nowhere made no sense to me. The Madonna shrine was unfortunately not my taste either and the lilacs were diseased with some kind of leaf rust. Finally, the chain link fence was rusted and falling down in back. So I had all the excuses I need for a Sawzall slash and burn.
Let's get to work...
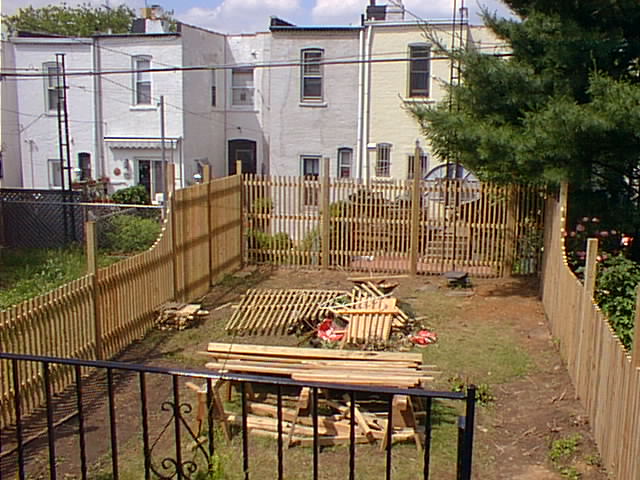
Work in progress. The fence was stick-built from CCA stock, with each picket glued and nailed. It wound up costing less than half the price of a pre-fab Illinois fence of similar construction (materials cost was about $750) and less than a quarter the price of an installed fence. Actually, it was easier to install than a pre-fab because we hit major obstructions while attempting to dig 8-foot standard post holes. So each of the panels is a slightly different length.
With help from my next-door neighbor, Betsy, and her friend, Todd Schultz, we got this far in five days. Once we got the rhythm and process down, we were able to knock off a panel every ten minutes, with a twenty-minute rehydration break between. The post holes were dug to between 24-36″ and filled with 100-150 pounds of concrete and gravel. Then we moved on to replacing Betsy’s fence too.
Betsy’s fence is finished. The post caps were installed and a gate was built between Betsy’s and my yards (in the shadows under the pine tree). I installed low-voltage lighting on the fence posts, as did she: a nice Hollywood touch.
I ripped up the lawn with a borrowed roto-tiller, tossed in six bags of peat moss and planted grass seed. This was just a temporary measure to anchor the mud. Since I planted grass so late in the season I didn’t expect a House and Garden contender here and my expectations were met.
This was shot in late November while the backyard is in winter shadow. You can see that I actually have something of a lawn now, as well as a small garden. I gave the pressure-treated lumber three months to dry out, then the fence was sealed with a semi-transparent stain.
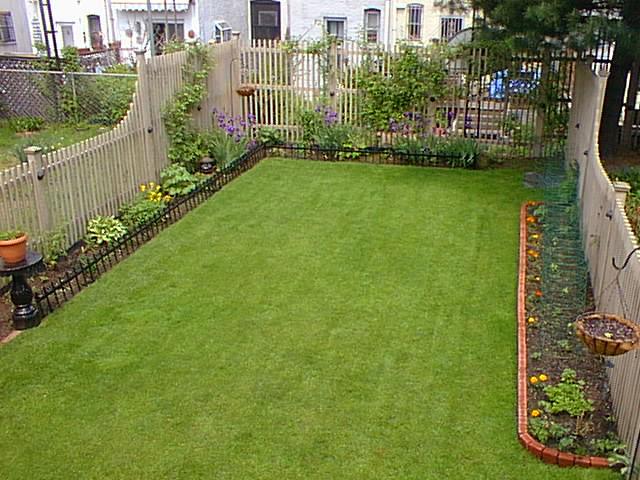
May 9, 2004. I did the lawn, roses and iron/brick work but Karen and Betsy are mostly responsible for everything else. There’s a pretty well-stocked herb garden on the left and veggies on the right.
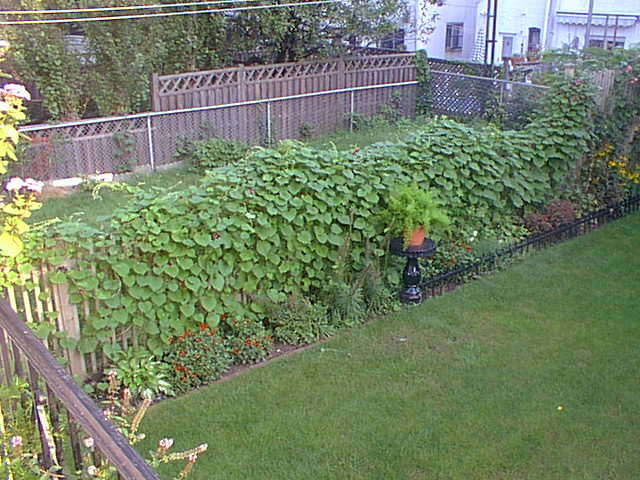
August 20, 2004. The morning glories have taken over. Next year, I’m going to lose them (which isn’t going to be easy) and plant roses and cucumbers on that fence. As a matter of fact, I think I’m going to dump most of the flowers and plant veggies instead. A garden should pay for its own keep.
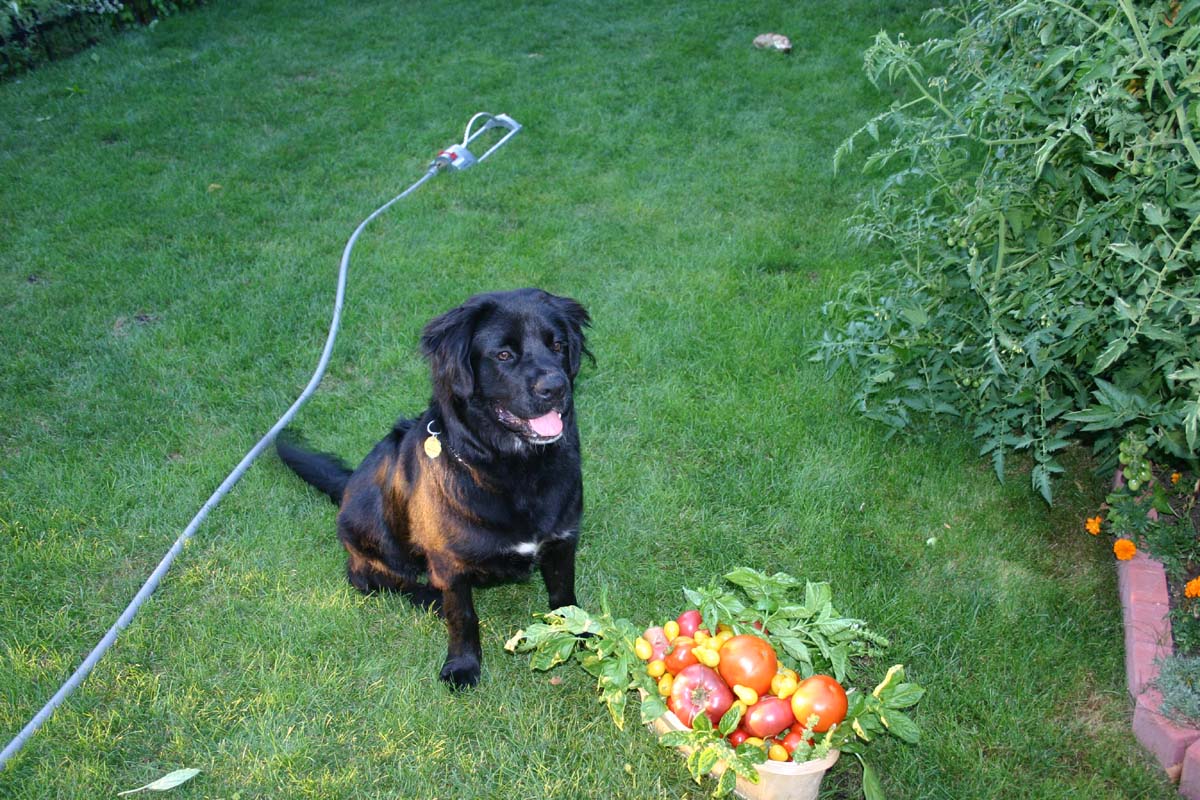
Summer ’05: my daily tomato and basil harvest. Two seconds after this picture was snapped, puppy Jack made gazpacho out of Betsy’s beautiful basket presentation.
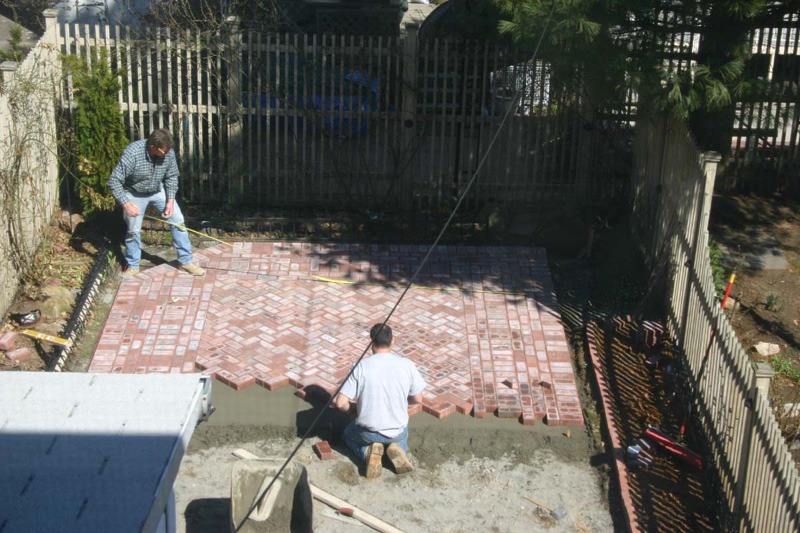
March ’06: I had enough heartache trying to keep the grass healthy, especially with two active puppies. So I had it bricked in.
I had intended to do this job myself but the more I got into the details, there were drainage and soil issues I wasn’t comfortable with so I called Jim Lally (upper left) of Galway Bay Contracting. I’ve used Jim for several projects here. He and Dessie Travers, his main man, laid it like a mud floor, with a 4″ concrete bed over crushed gravel. It meant having to excavate and remove over 10 cubic yards of dirt, which was another reason I wanted a crew for this. Jim is an artist and has always gone above/beyond with his jobs here. Check out the herringbone “dance floor” design in the middle.
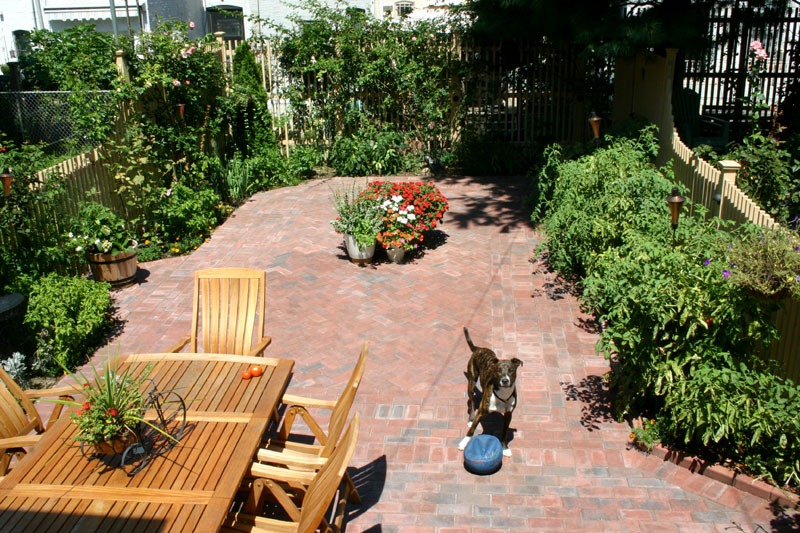
Summer ’06: So long as Auggie has a ball, he’s satisfied.
The pavers turned out great. Jim and Dessie always do a first rate job, which is one reason why I never learned masonry. A few days before they started the job, Jim called and asked me to give him a design for the layout. It was something I hadn’t thought about. Then I recalled a scene in the movie, “Arthur”, which had a cool masonry entranceway (I love film set decorations). I rented it, found that scene and sketched it out. It’s kind of faint in the shot but the middle is herringbone with a border, like a dance floor. Then I drew some cutouts and cutbacks for the gardens.
Jim groaned when he saw the herringbone because it meant about a hundred angle cuts with the diamond saw. We agreed on an extra thousand bucks for my indulgence. I think it was worth it.
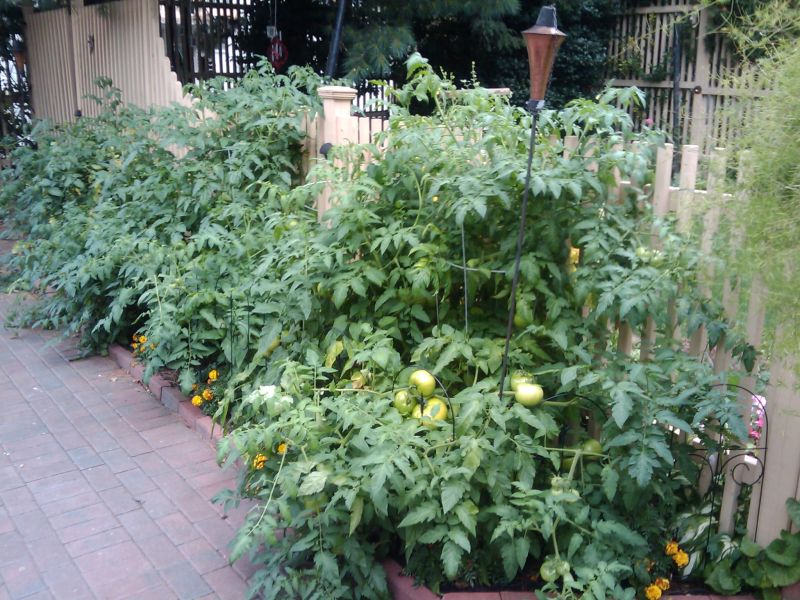
My first tomato crop!
Scroll to Top
Welcome to Brooklyn Row House
This blog is about the challenges of renovating an old (1903) Brooklyn, New York row house.
My last major renovation project was the master bedroom, most of which is about finish carpentry. You’ll find other completed home improvement projects in the Projects submenu at the top of this page.
I’m not a professional builder and don’t pretend to be. I’m just an experienced amateur raised in a family of committed DIYers. I try to closely follow local and national building codes but don’t mistake anything on this site to be professional or even accurate advice! Your mileage may and definitely will vary.
This is the third iteration of BrooklynRowHouse.com, from scratch-built to Drupal and now Wordpress. I hope you enjoy your time here.