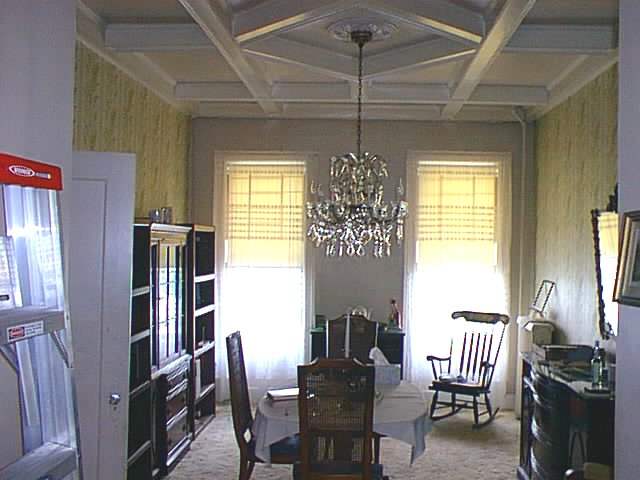
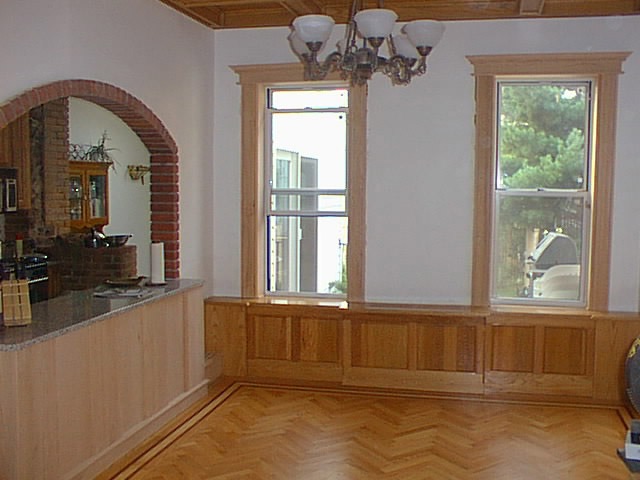
The dining room wasn’t in terrible shape, just abused. There used to be lots of architectural details in this room though: oak china cabinets, plate rail, gingerbread over the doorway and paneled walls. On the former owner’s inspection day, I was told that he thought it looked like a “moose lodge” so he ripped it all out. The 1960s weren’t a golden age for home decor. I blame Holiday Inn for the aesthetic minimalism.
Let's get to work...
The basement was such a wreck and had so many obstructions from lally columns and plumbing that it was impossible to use as a shop. So my dining room was it until I got the basement finished.
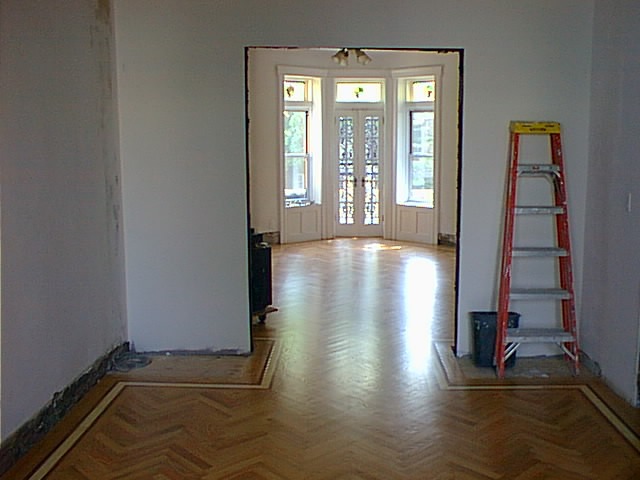
I ripped out the funky sheetrock closets. The rats’ nest of wires on the left is the CAT5 service stack to a hub in the second floor computer room.
You’ll see a lot of shots of Chopper, one of my cats. He followed me around like a dog, even up the stepladder.
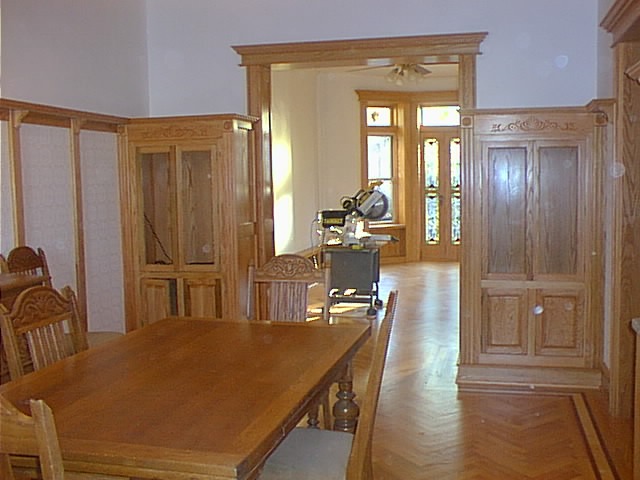
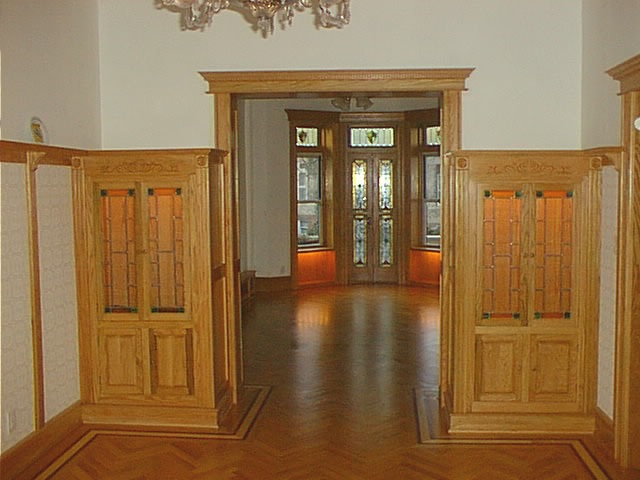
The new herringbone red oak floors are down with one coat of poly to go. Before that happens though I have to build a couple of china cabinets, which will go on either side of the doorway, and do the trim.
Herringbone is tricky to install, which is why you don’t see it often. The floor has to be perfectly flat and your layout line absolutely straight. You start with the initial chevron down the middle and work out from there. Any deviation or tiny gaps in the initial course will be magnified as you get closer to the walls. It took three tries to get that first course perfect.
I wanted to buy prefab border strips for the floor but they would have doubled the cost of the floor, This was made from maple and walnut. Cheap.
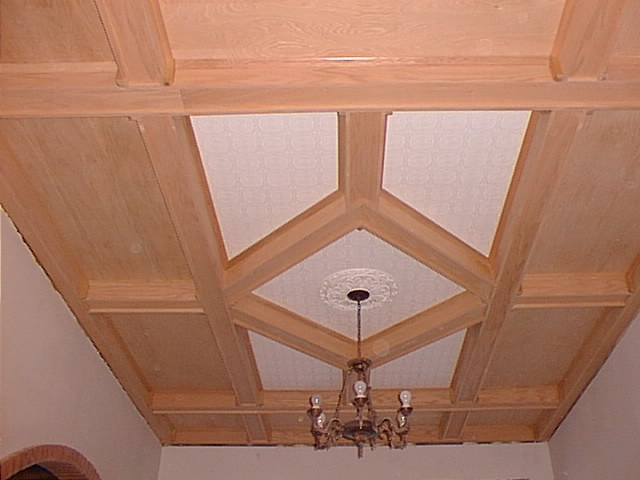
Ceiling in progress. I ripped down the old beamed ceiling and replaced it with fresh red oak. This was a bit of work and I’m sorry I didn’t take earlier progress pictures because this room was a mess. Once I started removing the beams and the old cleats, the plaster started coming down.
It’s similar to the original design but I couldn’t help making some changes, like red oak panels and corner blocks (milled from the old beams) to give it more of a mission look. This was an experiment using oak veneer plywood… some real nice stuff I found at Bay Ridge Lumber. While it was a lot more work than solid oak, it was cheaper and it will be more stable, which is nice with a five-hundred pound ceiling over your head. It’s hard to see in the photo, but the inset panels have embossed paper.
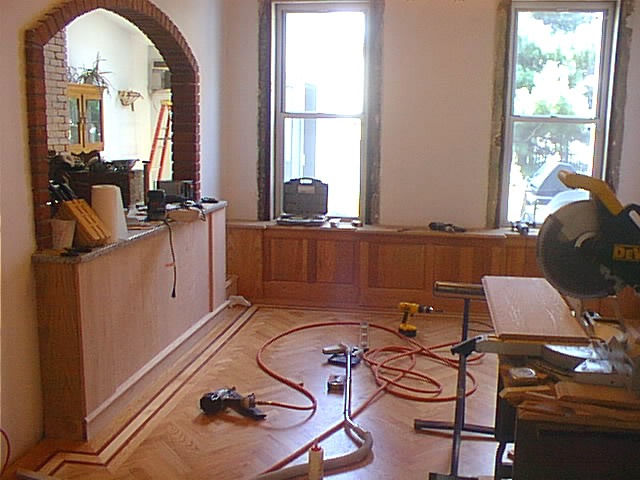
July 4th weekend, working on finish trim. I got rid of the old radiator in the back corner and installed a butt-ugly but efficient cast iron baseboard between the windows. To conceal it, I built a window bench. This was a scrounge job. I made the raised panels, rails and stiles by recycling the 100 year-old oak beams from the dining room ceiling. The top was made out of leftover oak slat flooring. It was also my first attempt at raised panels. You can’t see them very well in this shot but they turned out pretty nice.
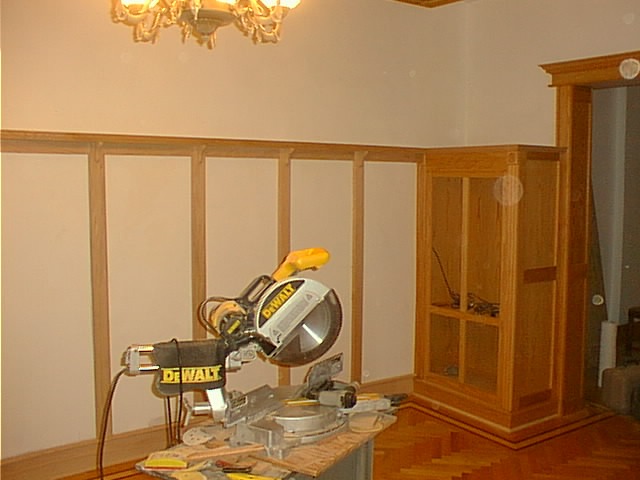
The trim is finished, waiting for stain and finish. The oak flooring worked out so well on the window bench that I built the four panels for the kitchen counter base with it. Tip: use pipe clamps to jack the joints tight. Squeeze clamps don’t cut it.
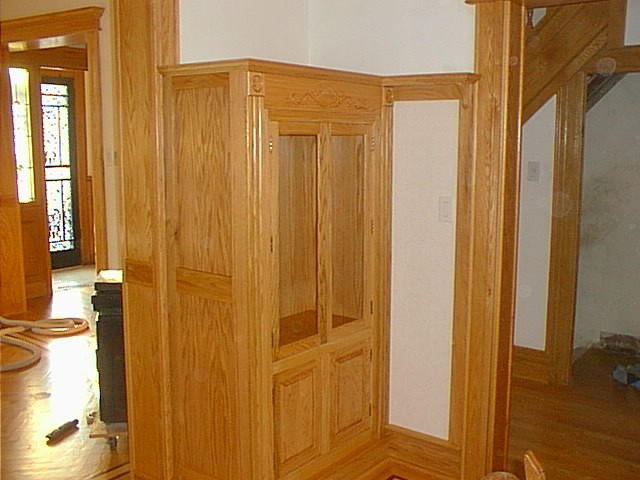
October, 2002: the final phase of the first floor trim out. I started the first floor project in July of 2001 so it took 16 months of weekends and holidays to get it to this point. You can see the shop stages of the cabinet construction here.
The left cabinet will be the audio closet. I pulled two pairs of #14 stranded wire for the speakers and ran a quad box for AC power, hidden under the shelf. There’s also wiring for low-voltage lighting and an ethernet hookup in hopes of online subscription music services getting a lot better than they are now.
The plate rail softened the starkness of that brick eyebrow, which looked great on the kitchen side but had an almost 1950s tract home look to it in the dining room. It still needs something on the arch itself, maybe an oak pediment. Or maybe the room just needs a decorator and some paint.
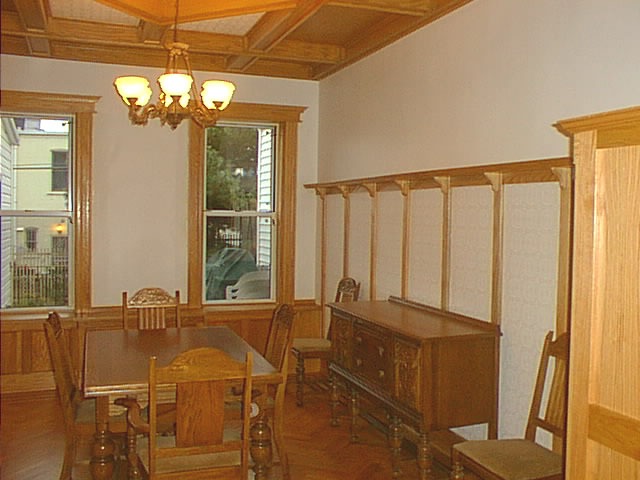
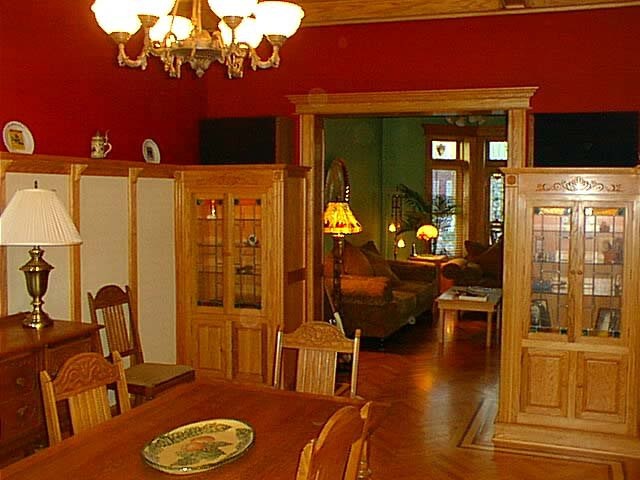
My first furniture came by accident. My friends attended a convention in Montreal. They wanted to buy an antique dining room set during the trip and, to make a long story short, they wound up buying two. I bought one of them. It’s red oak (what else?) It didn’t come with a pedigree but my guess is that it’s probably 1920-30s vintage. Close enough.
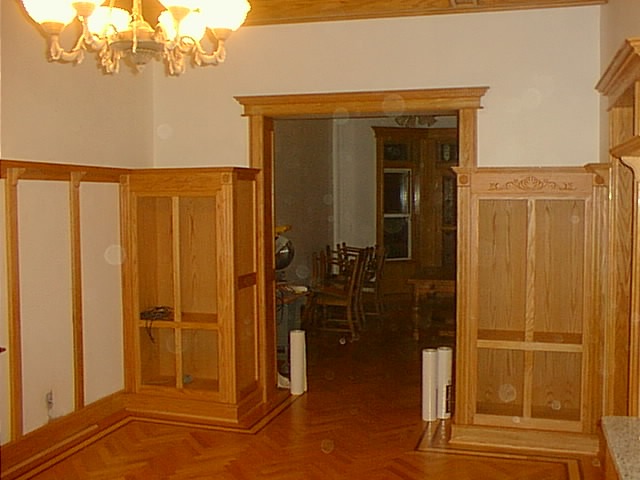
Hmm, it’s beginning to look like someone actually lives here.
It’s hard to see in this shot but the panels between the plate rail stiles were finished with anaglyptic paper, the same as in the ceiling panels.
View from the kitchen.
The aluminum windows need some faux oak paint. Curtains might help too.
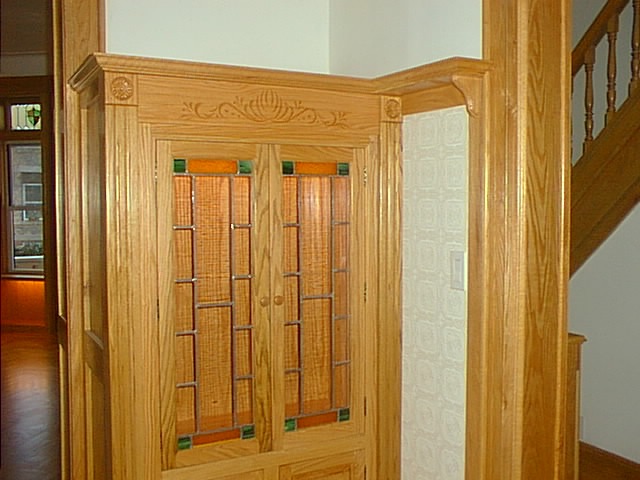
The stained glass is finished and installed. I had to take a close up shot here to show the cabinet detail (click on the pic for a better look). The carving looks impressive, doesn’t it? It took me all of five minutes. I did it with a terrific router system I found on the Woodcraft web site.
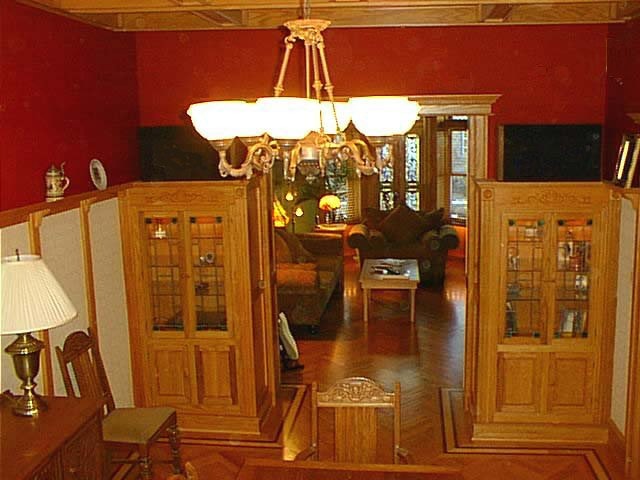
Low voltage lights were installed in the cabinets and under the living room windows, all running on X10 Insteon on my LinuxMacUniversal Devices ISY-994i dedicated server, of course. The furniture was removed for the final finish coat on the floors.
Well, the woodworking is done on this floor. I decided not to replicate the gingerbread over the cabinets like in the original house. And I decided against courtroom wainscot because, frankly, one more piece of red oak on this floor and I’d have to bring in pews. Next stop… the second floor.
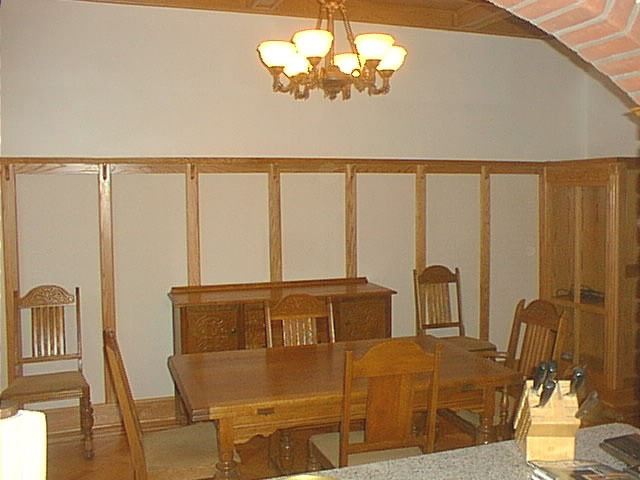
It’s finally painted! I’m not totally sold on the color but it does seem “period” enough for this room. My only comment here is that I hate painting. It took seven (7!) coats of red to obliterate the white primer, which I should have had tinted.
Another view. Yeah, that table lamp on the left had to go.
I was asked about the black boxes on top of those cabinets. Those are a pair of Polk speakers I’ve loved since I was in my 20s. It was an afterthought after I moved the multimedia stuff to a new cabinet I built in the living room and found a pair of excellent Polk in-wall speakers to replace these. The in-walls were a little thin sounding compared to my old Polks but a sub-woofer (a Polk of course) on top of that cabinet fixed that!
Scroll to Top
Welcome to Brooklyn Row House
This blog is about the challenges of renovating an old (1903) Brooklyn, New York row house.
My last major renovation project was the master bedroom, most of which is about finish carpentry. You’ll find other completed home improvement projects in the Projects submenu at the top of this page.
I’m not a professional builder and don’t pretend to be. I’m just an experienced amateur raised in a family of committed DIYers. I try to closely follow local and national building codes but don’t mistake anything on this site to be professional or even accurate advice! Your mileage may and definitely will vary.
This is the third iteration of BrooklynRowHouse.com, from scratch-built to Drupal and now Wordpress. I hope you enjoy your time here.