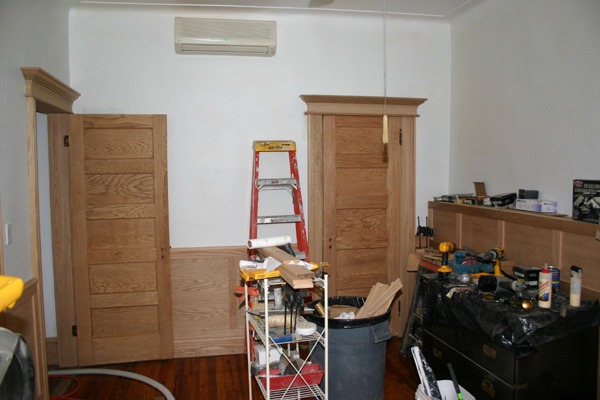
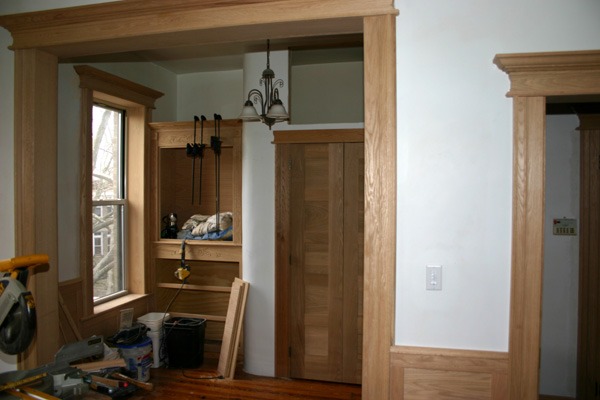
I’ve been looking forward to this day for months. Almost all the trim, the doors, cabinets, etc are done! What’s “almost”?
By “almost” I mean that the center of operations moves downstairs to my shop. The remainder of the trim work — the cabinet doors and drawers, the panels under the bay window, the stained glass window, the overhead closet doors and even the curved baseboard moulding for the closet corner have to be fabricated. I need my stationary power tools for this stuff.
“Almost” also means that I need to make a decision about whether or not to incorporate bolection a/k/a rabbeted panel a/k/a panel inset moulding into the wainscotting. I couldn’t find this stuff at my local lumberyards or online and the router bits I ordered which I thought might work didn’t do a very good job of it. I’m hoping the router geeks at this weekend’s Somerset NJ Tool Show will have some answers for me.
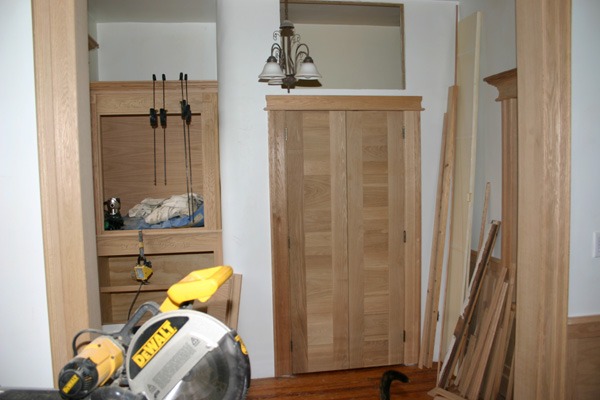
PS: the closet doors look like a bad panel lamination job in this photo. Actually, they’re five panel doors. You just can’t see the rails very well in this shot.
 “Almost” means that I haven’t framed the “attic” door opening over the closet or added crown above the closet door. It’s a lot easier to mortise for hinges after the doors are built and the pieces are on the ground. And I don’t know if crown on that closet door will even look right with that cabinet above it. I’ll need to see it with the cabinet doors in place.
“Almost” also means I haven’t made the lid for the top of that tall wainscotting yet. I haven’t decided whether or not to do that with oak plywood and a hardwood banding yet. It would save me a small bundle over 1×10 solid oak if I did.
“Almost” means that I have several days of sanding ahead of me, and probably a couple of not-so-skillfully-cut joints that will need to be hidden from critical eyes behind 3/8″ quarter-round.
 So then what’s the big deal? You ain’t near done yet, fool. It means that I can migrate most of my tools back downstairs to the shop, with the exception of the SCMS, nail guns and sanders. But mainly it means that I can get rid of about four trash cans full of scrap lumber and drywall… stuff I’ve been tripping over for weeks. I saved it in case I needed a shim or a filler piece.
We have a major snow storm coming Tuesday night, the same night as my garbage pickup, so that stuff probably won’t get collected for days. My friend around the corner said I could dump it in front of his place. His pickup is tonight and he’s been in Puerto Rico all week so he has nothing to put out. So clean-up is today’s priority.
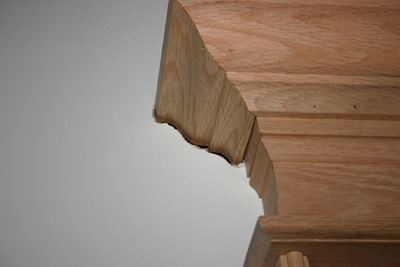
 Here’s another crown moulding tip for door and window pediments. When working with old plaster walls you can drive yourself batty trying to get the return pieces to fit snugly to the wall. For instance, a new doorway will probably (hopefully) be plumb but the surrounding wall may have settled a few degrees off plumb. Or the wall may have a bow in it. The solution? Don’t bother showing off your saw and scribing skills. Take a piece of crown moulding, pencil the profile on the wall, take a screwdriver and hammer and chisel out the plaster. Then just cut the return piece so that it ends just below the surface of the wall. You’re going to be repainting after a project like this anyway so what’s a little caulking repair? Just make sure to stain and finish the trim before you caulk.
PS: that little gap between the crown and the pediment below is for expansion. You need to be careful about making compound mouldings too tight during the dry winter months. Otherwise, a 90-degree, 98% humidity July day could result in that crown moulding corner splitting open.
![]()

