Shortly after I took possession of my house, I was cleaning up the cellar one afternoon when I noticed my cat, Chopper, engrossed with something halfway up the old cellar stairs. I checked to see if he might have a moth and instead saw a pile of paint chips and wood fibers below the stringer he was pawing at. With the paint removed, I saw hundreds of white wormy looking things. Termites!
How did this happen? I’d closed on the house nine months earlier. My inspector found some evidence of an old termite infestation and, to be safe, my lawyer made the closing contingent upon an exterminator’s report. The report was so terse that the inspector could have Twittered it: “Found/killed two termite colonies. No evidence of internal infestation.”
Evidently this bonehead’s inspection was as thorough as his report because the termites had dug a tunnel from the far foundation wall, across the ceiling through a 3″ floor joist, and down the stairs. It cost me $1500 to have a licensed, BBB-certified exterminator exterminate the house. There’s more to that story, but I’ll digress on that some other time. What matters is that I had to replace that staircase. I was very lucky it didn’t collapse on me.
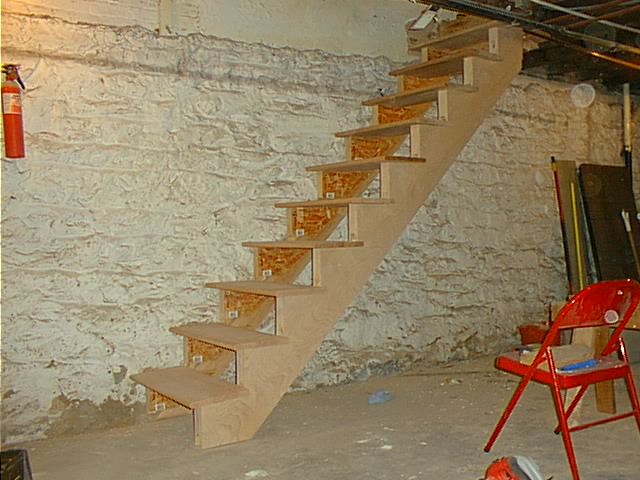
I had seen a stair building system on one of the home shows that I wanted to try, called EZ Riser. It’s basically a sleeve made of solid pine with “wings” made of particle board made to slip around a 2×8 stringer. With EZ Riser you avoid making a bunch of conventional sawtooth cuts in the stringer, which is not only time consuming but weakens the stringer as well. Instead, you slip the Easy Riser assembly around a 2×8, drive a bunch of screws into the wings and there’s your completed stringer, ready for treads.
I located a dealer for EZ Riser, bought a box for seventy bucks, then over to the Borg store to purchase the prefabricated treads and risers I needed. Construction literally took two hours. Easy breezy.
But it didn’t eliminate the need for tedious calculations of the rise and run. You still need a rafting square, a calculator and lots of pencil marks to locate the brackets on the stringers. Those calculations can be complicated and prone to error, especially with a staircase as steep and shallow as the one I was replacing. Nevertheless, I couldn’t see how you could improve on EZ Riser until I ran across another stair building system called EZ Stairs (below).
Calculating the rise/run was complicated by the fact that I didn’t have head room clearance for a more conventional 7.75″x10″ rise and run. But once I got something that worked, it was pretty mechanical after that. Bolting it to the ceiling header was a little tricky because the original joist had been chewed up by the termites too… in fact that was their I-95 to the stairs. I had sistered 2x8s on that joist which had heavy protruding bolts to contend with. The EZ-Riser devices are pretty ugly so I faced the outside of the stairs with some leftover birch plywood. The stair treads hide the plywood edge.
EZ Stairs takes a different approach. Like EZ Riser, you don’t have to cut up the stringer — just attach the EZ Stairs bracket to the stringer with screws. But that’s where the similarity ends. For one thing, EZ Stairs’ brackets are metal. But where it really improves on EZ Riser is the adjustable spacer tool that automatically sets your custom rise and run. The stringer is actually two parallel boards, which can be tongue-and-groove for a more finished look. After you’ve used EZ Stairs online calculator to compute the setting for the spacer tool and you’ve attached the brackets with one screw into each board, you slide boards in opposite directions and, presto, there’s your stringer. Just drive some more screws to secure the brackets and mount your treads and risers.
The EZ Stairs video will explain it better.
![]()