Just like software development, I like to break big projects down into milestones and mini-milestones.
| Milestone | Mini milestone |
| Wall prep | done |
| Structural carpentry | done |
| Finish woodworking | Wainscot east wall + outlets |
| Window and door trim – large room | |
| Complete wainscot – large room | |
| Window trim and wainscot – ante room | |
| Construct and install dresser and cupboard – ante room |
Ahhhh… and here we are (check!)
My next mini-milestone is the completion of all the woodworking in the hallway, followed by installation of the crown moulding over the windows, doors and this cabinet, followed by hanging of all the doors, followed by construction of the raised and louvered panels under the bay windows, followed by…. man, there’s still a lot to do before I can get to sanding, staining and finishing all this stuff. Despite all reasonable precautions, there’s dust everywhere in my house. I just want it to be o v e r!
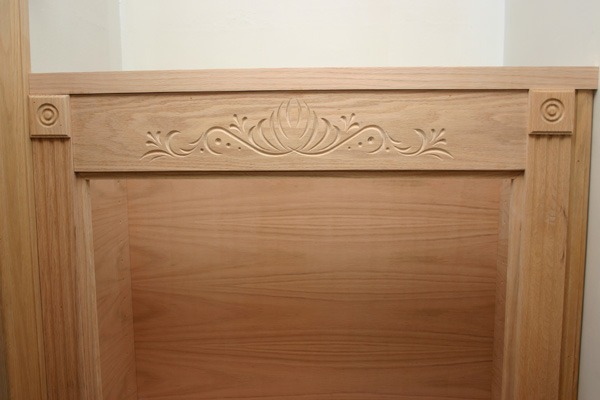 I replicated the dresser carving on the cupboard, which you can see a bit better in this shot. Crown moulding will be attached to that upper cleat.
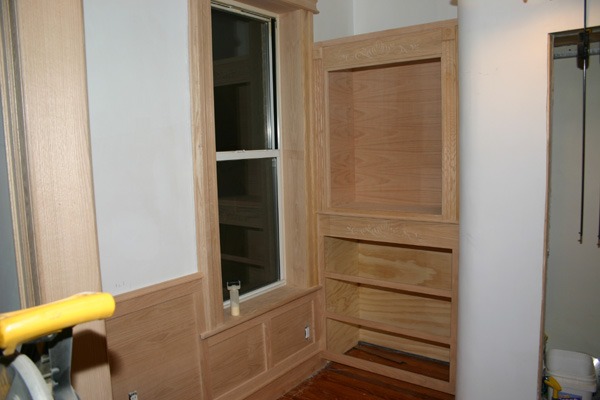
There was one screw up, which you can see from these photos. The cupboard isn’t centered in the opening! When I built the dresser I measured it to fit the alcove without accounting for the thickness of the window casing and wainscoting I would install later. That casing pushed the window wall out about 1-5/8″. As a result, it left me with a 1-5/8″ gap on the right (which is what I wanted) and no gap on the left. I realized this after I built the dresser but there was nothing I could do about it except to toss it out and rebuild a new dresser 2″ narrower. If Norm Abrams was gonna feature my bedroom renovation on his web site I might have done it too!
And there was a technical screw up. My plunge router has a plunger lock. Or rather, a plunger UN-lock. You have to hold down the lever to get it to either plunge or retract. I don’t know why Hitachi does this ass backwards from most of the router world but I’m used to plunge routers working the other way: e.g. flicking the lever locks the plunger in place.
What happened is that I had a brief bit of brain fade while doing these router carvings and lifted the router out of the template without depressing the plunger unlock. As a result, the bit was still extended and I gouged a big chunk out of the template. That delayed me for a day while I patched the template with epoxy fill. Dammit.
I’ve decided that the cupboard cabinet doors will be stained glass to match the interior window into the hallway, although something translucent because I’m not all that interested in highlighting the contents of my usually messy clothes cabinet. So that makes a total of five stained glass project on my plate when I’m done with this room. And five more blog entries to come.
![]()