There’s a subculture in the carpentry world that one could call “wood nerds”. They passionately argue with each other over arcane topics like fish glue and lumber humidity, armed with canons of really impressive woodworking knowledge. I learn a lot from them but after a while it’s like listening to trekkie geeks debate the relative pulchritudes of Lt. Uhuru versus Seven of Nine.
One of these contentious topics is “face frame” versus “32mm frameless” cabinet construction. Most traditional cabinets are face frame while “European style” cabinets are generally frameless, or boxes with full-width doors. Both work. That’s about the extent of my interest.
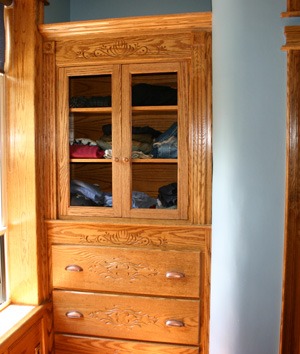
Today I built a face frame. It will be for a 44″, built-in dresser for my bedroom reno. Because the dresser will be installed in an alcove, all you’ll see of it are the drawers and the face frame. It will have a cupboard mounted on it so it doesn’t need a nice top. I can even save a few bucks by using A/C plywood for the carcass. Easy-breezy. But this is about the face frame, most specifically the bottom drawer unit for the cabinet, above.
The frame is red oak. Most of it is leftovers from the bedroom renovation. There’s a 1×6 top rail, a 1×3 bottom rail, 1×3 stiles and 1×2 stretchers (the spacers between the drawers). I debated whether to make this a three or four drawer dresser. I settled on three deep drawers because it means one less messy drawer.
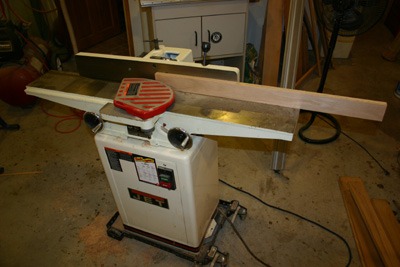
When cutting face frame components I slightly overcut each piece, then edge joint them to remove any bows and run them through the planer so everything fits flush. It’s surprising the differences you can find in 1-by lumber, even with lumber from the same yard. I’ve seen it vary by as much +-1/16″.
Then I remeasure, clamp the sibling pieces together and cut them to finish size together. Besides guaranteeing exactly matching lengths it reduces tear-out.
The next step is dryfitting them to make sure everything plays well together.
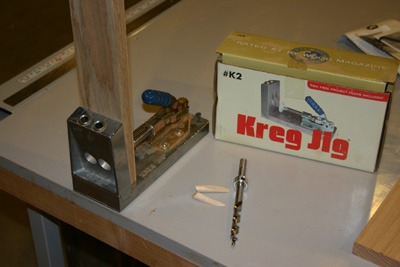
Using a jig I drilled pocket holes on the back side of the stiles and stretchers. These hold recessed, galvanized screws. I resisted pocket hole construction for years as a cheap production shop shortcut but I got over it. It virtually eliminates clamping time and makes for a much stronger frame, which is another positive because a face frame cabinet gets most of its strength from the frame.
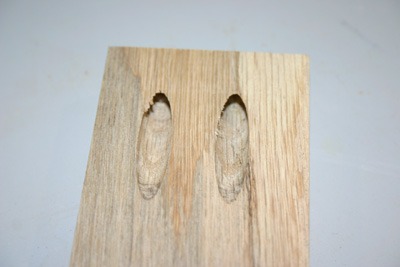
It leaves you with holes like this. A little glue and a 1-1/4″ galvanized screw and the joint is stronger than the wood around it. The hole can be plugged with a dowel but I usually don’t bother with something like this, which you can only see by pulling out the drawers and sticking your head inside.
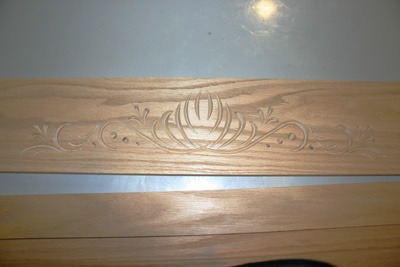
I wanted this cabinet to have some decoration so I decided to incorporate a carving on the top rail that’s sort of become the logo for this renovation. I even have one over my garage door.
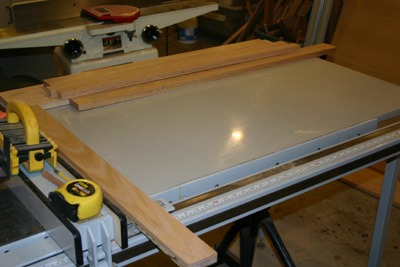
I had to darken this photo in Photoshop because the wax on the tablesaw extension was too reflective.
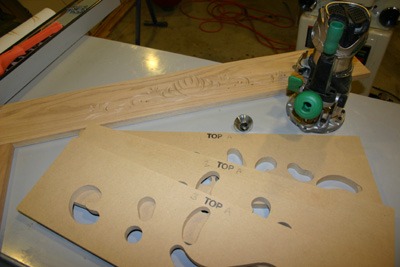
Because I absolutely suck at wood carving, I used technology. I did it with a plunge router and a template system. It took less than fifteen minutes to finish the “carving”. In fact, I know exactly how long it took. I started with “Born In The USA”, then Metallica’s “Wherever I May Roam” and finished the job on the closing chorus of Weather Report’s “Birdland”.
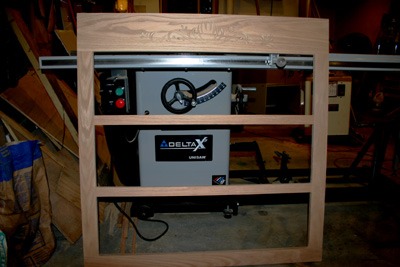
Finally, I assembled the face frame. I don’t have room for a real assembly table in my shop yet so I used the table saw extension and a rafting square. A little glue and some pocket screws aaaand… done.
Then I loaded a stacked dado head in my table saw and cut 3/4″ dados for the cabinet sides. This increases the glue surface and makes for a much stronger joint. The trick is to make the dado shallow enough that it doesn’t hit those pocket screws or I’d be out a $90 Freud dado set. I’ve already trashed a saw blade on this project so I’m at my limit.
Finally, a little sanding through the grits (100/150/220) and it’s ready for the carcass. Total time to completion: two+ hours.
This blog is about the challenges of renovating an old (1903) Brooklyn, New York row house.
My last major renovation project was the master bedroom, most of which is about finish carpentry. You’ll find other completed home improvement projects in the Projects submenu at the top of this page.
I’m not a professional builder and don’t pretend to be. I’m just an experienced amateur raised in a family of committed DIYers. I try to closely follow local and national building codes but don’t mistake anything on this site to be professional or even accurate advice! Your mileage may and definitely will vary.
This is the third iteration of BrooklynRowHouse.com, from scratch-built to Drupal and now Wordpress. I hope you enjoy your time here.