Six years ago, I was building the bar for our new restaurant in Brooklyn Heights. The bar was four plywood cabinet carcasses with a laminated mahogany top.
A friend of mine and I stood freezing in the unheated storefront staring at the chop saw, the bar, and a sixteen foot piece of 8″ rabbeted mahogany cap moulding we were going to use to trim the edge. The object of our fixation was a ninety degree corner. It’s a simple cut except when the moulding costs $18/lf and it’s the last last piece that Dykes has. We only had one chance to get it right. Which one of us had the juevos to make that cut?
We spent an hour measuring, second guessing, aligning the saw, making test cuts on scraps, postponing the inevitable. John was fed up and proved he had the bigger pair. The cut worked. Well, close enough for his Harbor Freight Special miter saw anyway.
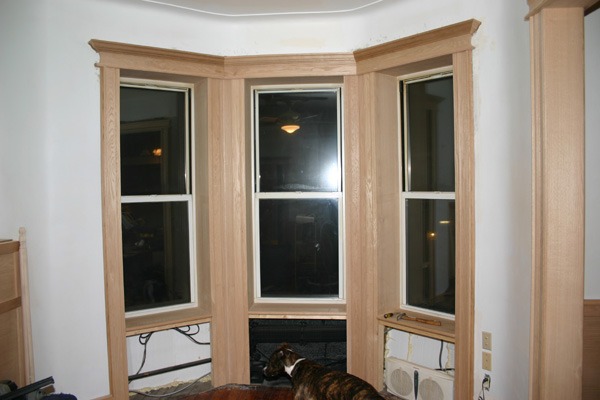
Last night I started on the crown moulding in the bedroom and hallway reno – ninety feet of it overall. That includes the three bay windows, two standard windows, seven doorways, the wide opening between the bedroom and its anteroom (both sides) and the built-in cabinet.
While the cost of the red oak crown moulding ($2.50/ft) is nowhere near as frightening as that bar moulding you can still make an expensive mistake which will render seven or eight bucks worth of lumber useless, except maybe to trim a yuppie dog house. The rule of thumb is that if you blow a crown moulding cut, the bad piece will be about 1″ too short to re-use anywhere else. Prove me wrong.
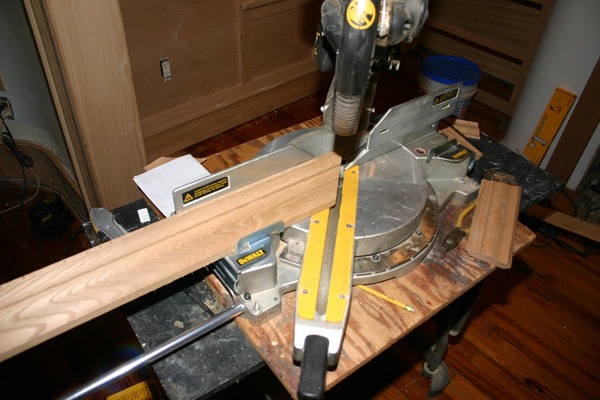
Making matters more interesting is that you cut crown moulding in a miter saw upside down and backwards. The saw’s deck represents the “ceiling” and its fence the “wall”. The lean angle of the crown in the saw has to be precise as well.
But the cutting formula is pretty simple, if not intuitive:
For an INSIDE CORNER
LEFT SIDE of the corner:
- Miter RIGHT.
- Save the RIGHT SIDE of the cut.
RIGHT SIDE of the corner:
- Miter LEFT.
- Save the LEFT SIDE of the cut.
For an OUTSIDE CORNER
LEFT SIDE of the corner:
- Miter LEFT.
- Save the RIGHT SIDE of the cut.
RIGHT SIDE of the corner:
- Miter RIGHT.
- Save the LEFT SIDE of the cut.
I can’t remember this to save my life so I have it written on a crumpled piece of legal paper that I tape to a nearby wall whenever I’m cutting crown. I should probably get it laminated.
Fortunately, applications like this don’t usually require coping the joint but measuring is pretty critical, particularly with regard to the angle. When in doubt, I make practice cuts on scrap pieces (those botched cuts at least have some cadaver value). A half-degree can make the difference between a seamless cut and one that won’t glue well or, worse, is a half-inch off high on the other end.
On to the actual cutting, I used to manually hold the moulding against the miter fence. Since the top and bottom edges of crown moulding usually form a right triangle that generally works. But I ran into consistency problems where that angle was off by a few degrees, making joinery problematic. I decided to invest in a pair of accessory crown moulding stays for my Dewalt DW708. It’s way overpriced for what it is but it can save a lot of work and wasted lumber. You can see them in the pic above.
What I usually do with crown is overcut it by a quarter inch or so then close in on the final cut by slicing away little slivvers till the joint is tight. This gives me the opportunity to adjust the angle of the cut slightly in case things aren’t as level and plumb as they look. It means a lot of trips up the ladder but look at all the money I save on health clubs.
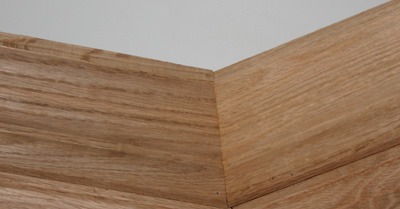
One thing to remember: a sliding compound miter saw can cut in two axes (yeah, I had to look up the plural spelling of “axis”). Don’t overlook that fact when you find that a corner isn’t joining tightly. Sometimes your miter is fine but the two walls are off plumb/level. For this corner I had to dial in 4 degrees of bevel along with 18-1/2 degrees of miter to get the joint that tight.
I usually prefab the moulding details over doors and windows on a table then slip them into place. By the way, the woodwork is all red oak. It’s all different colors because some of it has been sanded to 220, some of it’s still raw and some of it is 100+ years old. Since it’s all going to be sealed and stained it should all blend pretty well in the end.
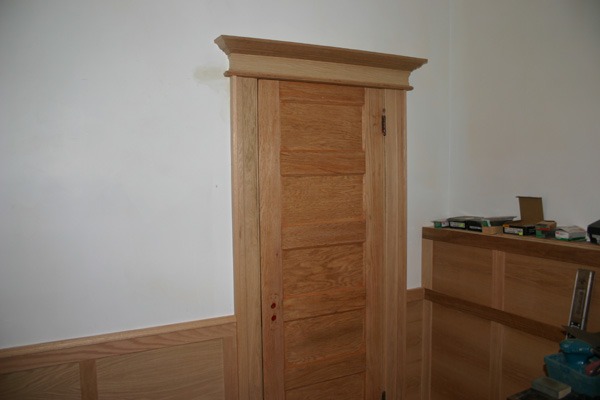
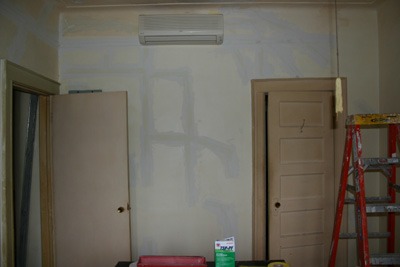
PS: this door was a real problem. Here’s a shot of the same door before I stripped, reframed and rehung it. It’s original to the house but for some odd reason it was almost 1.5″ out of square. So was the framing and, no, it’s not a settling problem. In an early blog post I mentioned my suspicion that the workers who framed this house probably liked their liquid lunches.
I’ve yet to find a flexible corner clamp for gluing up crown (at least one that works) so here’s a tip for mouldings with short corner returns like some of these: use a glue roller to smear a thin coating of glue on both joint faces. Let it dry for a minute then hold the two pieces in place for about three minutes till the glue gets tacky and takes hold. Gently lay it down and do the next assembly. When you’re finished with that one go back and drive a couple of brads in the corner. If you try to do this while the glue is still moist the pieces will almost certainly slip out of alignment.
Freestanding crown needs to be supported at the top, if only because sooner or later some chucklehead is gonna try to do a chin-up on it. In the past I’ve used angled blocks for support but I’m going to try something new this time, employing my new best friend: spray foam insulation! It’s very sticky and has excellent tensile strength. If you’ve ever tried to clean dried Great Stuff off a wall you know you’ll probably take the paint with it. So I’m gonna drive a few protruding screws with fender washers into the header behind the crown and fill the “bowl” inside the crown with urethane spray foam insulation. What do you think?
![]()