I don’t like drywall. I like plaster. I don’t like composite mouldings. I like hardwood. I don’t even like prefab mouldings. I like to cut my own. So why would I like something as new-fangled and artificial as engineered flooring?
Actually, I don’t. Even though I went through bloody hell to lay those herringbone floors in the living room, solid hardwood is still my first choice. But there were reasons why engineered flooring was the better option for the second floor in my house. One is that I didn’t want to add an extra 1.25″ to the height of the top stair. That’s what would have been required if I’d gone with 3/4″ hardwood. I can’t count the number of times I’ve tripped because of uneven stair heights, on one occasion fracturing a shoulder. Also, an engineered floor has a finish at least twice as hard as that of any job-site applied finish. With two big dogs tearing up my hardwood floors downstairs that’s not a small selling point for me. However, there’s a big “but” with this stuff which I’ll get into later.
Just to be clear, engineered flooring is in a different class from laminate a/k/a Pergo™ flooring. It’s got a facing of real hardwood over a plywood backing. You can even sand them, although the best grades have 30 year warranties. Here’s a pretty good engineered flooring FAQ so I won’t go into the details, except that I chose Mannington’s Ashville Saddle Oak Plank — the same stuff I used in my office and guest room.
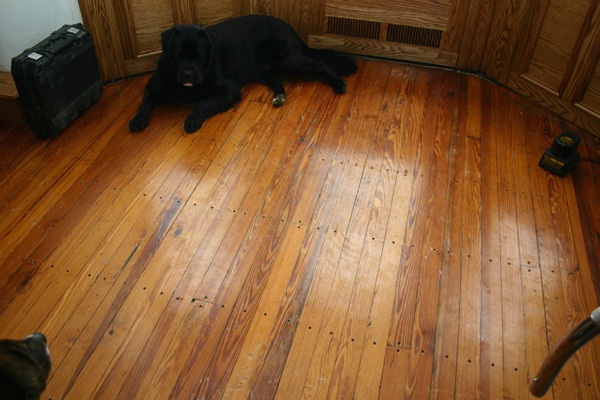
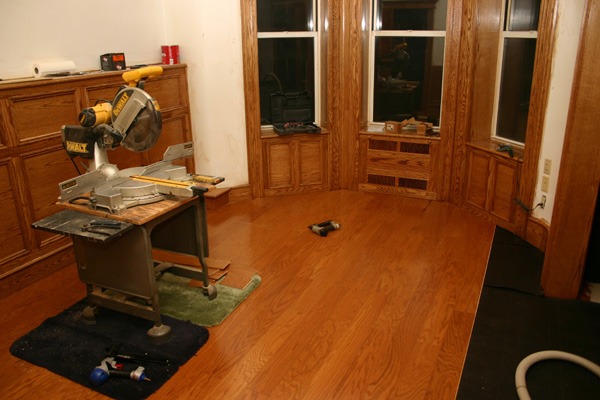
The above photo is the floor I started with.
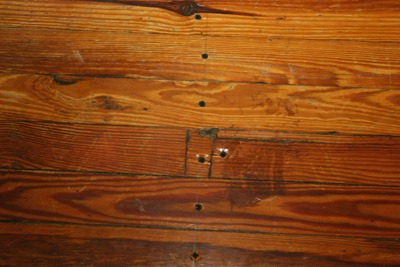
Before some wag says, “Hey, the original floors look great! Just refinish them!”, I did! Five years ago. These yellow pine floors are a PITA. Despite three coats of oil poly, they’re delaminating. This is probably due to years of someone using liquid wax on the raw wood which only melted it further into the floor with the heat of sanding. I’ve got so many splinter scars in my feet they look like they belong to a junkie.
 ’nuff said. Let’s move on to the HowTo.
Preparation is critical to laying an engineered floor. The first step is to tighten up the existing floor to eliminate squeaks. I did this by driving 1-5/8″ deck screws into each floor board at every intersecting joist. Five pounds of ’em in the bedroom and hallway.
I used a nail finder to locate the joists and penciled a guide line down the floor.
 Next, use a six-foot level or a very straight board to look for high spots in the existing floor. Any bump 1/4″ higher than the surrounding floor over six feet should be sanded down. Fortunately, I only had one of them. A belt sander made quick work of it.
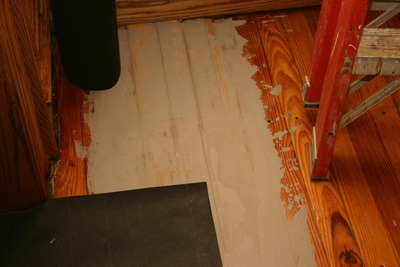 Now you’ve got to deal with the low spots, with the same dimensional restrictions. The solution in this case is floor leveler, a vinyl-fortified cement mix. I used Armstrong S-194. Sand the area with 60 grit to remove the old finish, mix up the leveler and trowel it on. Use a screed board to level it with the adjoining floor. This stuff dries very quickly (12-20 minutes) so mix small batches. It also sticks to anything, including expensive lavatory faucets. Ask me how I know.
Then vacuum the floor thoroughly, fixing any protruding screw heads.
Depending on how you will lay the floor, you’re almost there. You have three installation options with engineered flooring: floating, glue-down or staple down. I’d never have a floating floor in my house so we’ll skip that one. I did a glue-down in my office. While the results were good and in some respects superior to staple-down, it was one of the most miserable, messy jobs I’ve ever tackled. I wouldn’t recommend it.
Staple-down is the way to go. But you’ll need a compressor and a stapler capable of driving heavy 1-3/8″ staples, like the Spotnails WS4840. They’re expensive but don’t even think about buying one new. You can find them on eBay for around $40. They’re almost useless for anything but laying flooring so a lot of them wind up there after their owners’ flooring jobs are completed.
Using a hammer stapler, lay down either rosin paper or builders felt. I prefer 15 pound builders felt because it has a slight cushion to it. You can also use 30 pound felt, or two layers of 15, for additional cushion.
 The first course is the most important. If it’s cockeyed, your floor will be a mess. The instructions that come with the flooring will explain the details and caveats. All I can add to them, besides the warning to read those instructions carefully, is to watch the depth of your staples. My manual said to set the compressor to 80psi. Because I had a hundred-foot hose on the compressor, I needed 90psi to get the staples to seat properly. This is important because of the tight tolerances in the flooring tongues. If the staples are too high you’ll see little lumps in the face of the finished floor, which will become abrasion points later. Too low and they’ll split the tongue.
I got this much done in five hours. Keep the floors clean!. Sawdust on these prefinished floors makes them as slippery as ice.
![]()