Most people seem to like the flat, clean effect of drywall. Drywall is cheap, goes up easily and doesn’t take much acquired skill to learn how to tape, mud and finish the joints. Even drywall repairs are relatively painless. So what’s not to like?
Maybe I’m just weird (well, there’s probably no contesting that) but I like plaster. I like the way side lights create shadows and textures over the natural unevenness of a plaster wall, giving it density and bulk.
The problem is that I absolutely suck at plastering. My plaster work usually looks more like adobe, with half of it winding up on the floor and the mix setting up before I can work it. What I used to do is use plaster to get the wall in the ballpark then add a finish coat of joint compound with a 12″ blade, followed by copious sanding that left me, the room, and much of the rest of the house, looking like the set of The Polar Express. It was a tedious, laborious and dirty business.
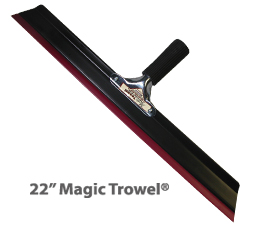
Then I ran across a tool with the dubious name of Magic Trowel.
 I watched a demonstration at a woodworkers show and it looked so easy. But I’ve been burned enough times by affable salesmen selling miracle niche market tools to know that my mileage may, and probably will, vary. I’ve got a box full of Magic Planes and Magic Coping Tools and Magic Drill Bit Sharpeners to attest to that.
But I knew enough about joint compound to know that the concept seemed solid: a wide squeegee blade instead of a hard-edged metal taping knife. It was worth a shot.
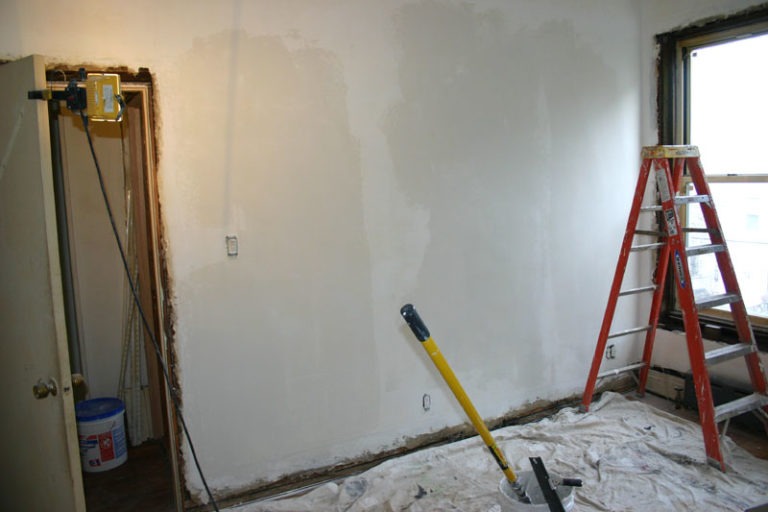
The verdict? It works very well! After extensive plaster repairs to my living room I skim-coated it in about two hours. Even better, I only had to give the 200+ feet of mesh tape I used to fix cracks just one coat of compound before skimming the wall with Magic Trowel. The compound lays down so thick that it sinks the exposed tape. It didn’t completely eliminate the need for, or the mess of, dry sanding but it reduced it considerably.
So why not just use a garden-variety squeegee? Magic Trowel is different than a squeegee normally used for cleaning windows. The long flexible blade floats over the surface pushing down on high spots. The 30-degree angle on the outside edges reduces tension on the ends of the blade leaving minimal trowel lines. Those that it does create are easily sanded off later.
There’s a technique to using Magic Trowel but you pick it up pretty quickly. Use long strokes, top to bottom. Don’t obsess on small divots or gouges. Those can be easily patched later. Instead, work quickly and use consistent pressure.
The company advises adding 8 ounces of water to a five-gallon bucket of joint compound to thin it out for rolling. I found that mixture to be too thick. In fact, I experimented with the mix by replacing one gallon of compound with a slightly soupy mix of plaster of paris and a couple of ounces of white vinegar to retard the plaster from hardening. It worked but you have to work even faster.
You’ll need a painter’s paddle and a torquey, variable speed corded drill to mix the compound. Warning: I damaged the collet on and practically overheated my Milwaukee drill mixing joint compound. Unless you want to mix small amounts, use a substantial drill for this, not a cordless, not a Target red dot special! And do it at slow speed unless you want to be scraping compound off the dog.
 If you do this over an existing old plaster wall, make sure it’s clean and degreased. If the wall has anything other than a flat paint on it, scuff it up with an orbital sander. Wash it down with TSP twice and rinse it down thoroughly. I lay down a plastic sheet and cover that with a cotton drop cloth. Ignore the video, above. This is messy!
Work on vertical sections and don’t let the edges dry out. As I said before, don’t obsess with making the wall perfect at the expense of letting the compound get crusty. You can always fix it later. Also, keep your compound, the blade and the wall clean! Any foreign matter will create long gouges in the finish.
After the wall has dried, dry sand any high lumps, fill any gouges with a taping knife and give it at least two coats of primer/sealer. The compound will really suck up the paint so you need to seal it well before you roll your finish coat.
I had concerns about the softness of joint compound as a skim coating material but after four years in my entry hallway the finish still looks like the day I primed it. My guess is that the primer sucks into the compound, making it more durable. But that’s just a guess.
Just keep your eyes on this tool because once your fellow tyromaniacs see the results they’re going to want to borrow yours. Mine has done five houses. Unfortunately, they were casualties in one those houses, which had a bad basement fire.
![]()