I’ve blathered a lot on the blog about the coolness of routers but another tool I use quite a bit is a biscuit joiner.
What’s that? Bread glue?
It’s a tool I first saw TOH demigod, Norm Abrams, use back in the 80s. Okay, let’s be honest: Norm has a shop full of bizarre, narrow purpose tools. But a biscuit (or plate) joiner is really useful, especially for edge-laminating boards as I’m about to do here. It can also be used to strengthen mitered corners or to insert alignment pins. I did the latter when I installed the heavy mahogany header in my garage door surround.
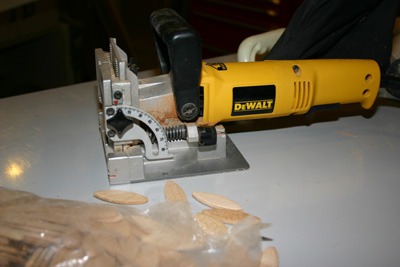
A biscuit joiner is a mini-circular saw mounted horizontally on a spring loaded handle. Its sole job is to cut a crescent-shaped slot in a board for an oval “biscuit”, which is a piece of (usually) beech wood or compressed beech wood shavings. Functionally, the biscuit works like a dowel but without the sheer strength of a dowel.
So why not use a dowel instead? Because dowels have to be drilled with a great deal of precision — more precision than most home tyromaniacs like me can achieve, especially on a long board with several dowels. A biscuit’s profile makes it possible to adjust the boards +- 1/16th inch after final assembly… at least until the glue swells the biscuits and the boards lock permanently into place.
 Here, I’m edge-laminating a 1×3 piece to a 1×8. (Ignore the routed profile on the edge of the 1×3. That was from a failed experiment. I’ll cut it off later when I size the shelf, which needs to be 9-1/2″ wide.) Why don’t I just use a wider board? Two reasons. One, a 1×10 is pricey. But mainly, laminating boards makes for a stronger and more stable panel. The grains in the respective boards work against each other to keep a panel from cupping or twisting. Think “butcher’s block”.
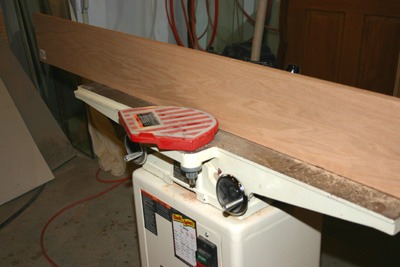
Stock lumber rarely has a square and straight edge, especially if it’s been sitting in a dry shop like mine for a few months. So the first step is to make sure the edges of the two boards are dead straight and perpendicular. I use my jointer/planer for that.
 I edge joint the board in 1/32″ increments until it’s perfectly straight, which you can tell when the jointer blade makes contact along the entire length of the board.
The next step is to clamp the boards together and draw pencil lines across the seam. These will be guides for the index mark on the biscuit joiner. You’ll also use those lines when you assemble the boards.
Next, cut slots in both boards with the biscuit joiner. No photo is necessary here. Just put the joiner’s index line on the pencil mark, squeeze the trigger and push it in. Done.
A tip: press the board firmly against the deck because any slight arch in the board will result in a misaligned joint later. I clamp the board to my table saw, which is the flattest thing I have in my shop. Use a clamp over each slot.
It’s always a good idea to dry fit the boards before gluing, if only to make sure you haven’t missed a slot and that your biscuits will fit. Room humidity can cause biscuits to swell so you want to get rid of those before you commit to using them.
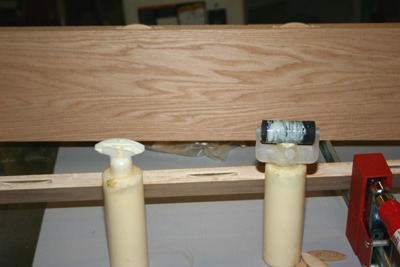 Using a biscuit applicator on a glue bottle, spread a decent coating of glue in each slot. I tend to overdo it here because glue is a critical component in the strength of the biscuit. The moisture is sucked up by the biscuit causing it to swell and weld itself into the slot. Then run a glue roller over the edge of the board. Do this for both boards.
Insert biscuits in the slots in one of the boards, centering them. Then assemble the two boards. I usually start at one end and, using a bar clamp, gently press them together.
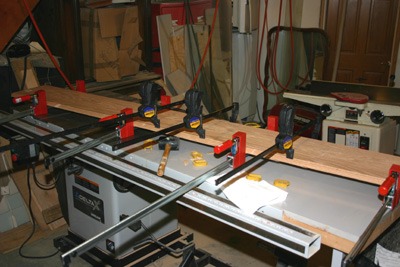 Once all the biscuits are in their respective slots, slap a bunch of bar clamps on the assembly and squeeze them home. Distribute clamps on both sides of the board for equal tension. Then set it aside for about 30 minutes for the glue to cure.
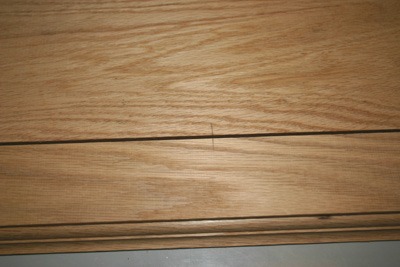
There’s almost always a tiny bit of misalignment of the boards. A planer or sander will fix that. If you’re skilled (and lucky) it will be hard to spot the glue line later. Hint: that big gap is the two shelves side by side.
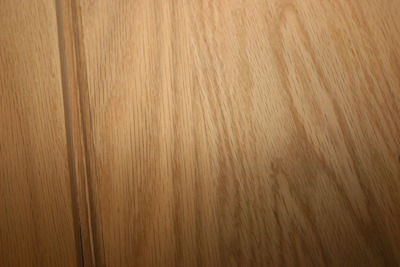 What usually gives the seam away is the abrupt change of grain. A really hardcore woodworker (which I’m not) will both color and grain match laminated lumber so that it’s almost impossible to see that glue line.
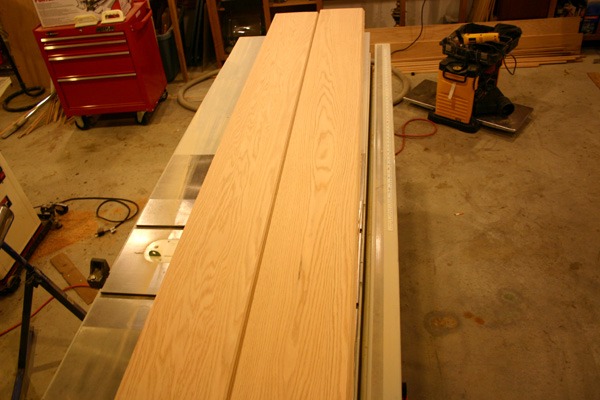 Tomorrow, I’ll rip these to width and mould a front edge on them. I’ll also probably build up the edge to 1-1/4″ thick to give the shelf a bit more visual weight.
![]()