I finished cutting 208 feet of bolection moulding for the wainscotting in the bedroom reno and guess what? I needed 216 feet to complete the job, dammit! I knew I was cutting it close (literally) but I only had a couple of (expensive) red oak 1x8s left which I need for the wainscotting shelf. I’ll dig into my red oak scrap pile and cut the remainder this afternoon.
Anyway, I was right. A bolection moulding a/k/a inset panel cap moulding a/k/a rabbeted panel moulding is just an inverted base cap profile with a rabbet. After my router bit quest, I settled on a $28 base cap bit from Woodside.
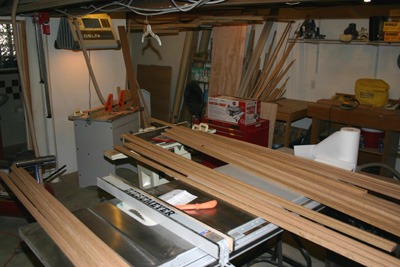
So it was back to the shop to rip a bunch of red oak to the 1-1/4″ width I needed for 26 eight-foot blanks, which I thought would do the job if I planned my cuts carefully.
Man, this shop needs cleaning and reorganizing after six months of this renovation!
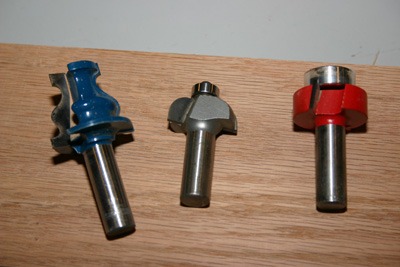
But what started off as a two bit job (hey!) became three bits. I didn’t like the abrupt return to the panel so I modified it with a step down. These are the three bits I wound up using to cut this bolection moulding.
From left to right: the base cap bit, the concave bit and the rabbeting bit. Pretty colors!
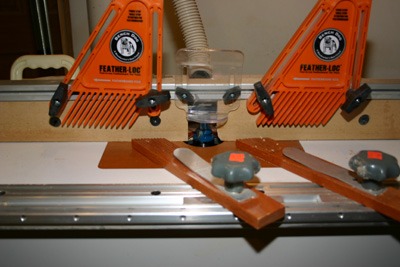
The set up was the most tedious part of the job, which is why I’m so annoyed that I have to go through it all over again for another eight feet.
I ran some test cuts of the base cap bit on scrap plywood until I got the depth and length I needed. This was pretty much established by the fixed profile and length of the bit but you still need to set up the fence and vertical depth on the router. Then I ran a bunch of 1×6 oak through the table saw to get the 1-1/4″ width of the bit profile. Why 1×6? Because the leftovers gave me the stock I need to cut the quarter-round shoe moulding I’ll need after the new floor is down, if three times as much as I’m actually gonna need.
Then it was four passes through the router, dropping the fence back in steps to avoid chunking the wood. You never want to cut deep profiles in one pass because you can damage the bit, the collet and especially the wood. The last pass was barely 1/16″ deep to shave the surface smooth.
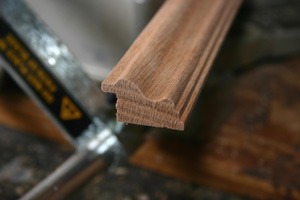
Next was a concave bit. I didn’t need the concave; I needed the very bottom edge of it to create that little step down.
Finally, using a 3/8″ depth pilot bearing on a rabbeting bit, I made the dado for the back. This creates a recess for the raised rails and stiles of the wainscotting and hides that square edge.
… and here, at last, is the finished profile.
Whew. Next time, I think I’ll spend more time looking for prefab moulding. Probably twenty bucks worth of red oak was sucked up by the dust collector.
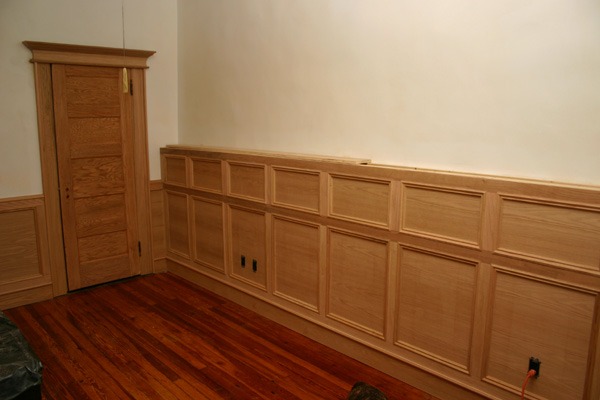
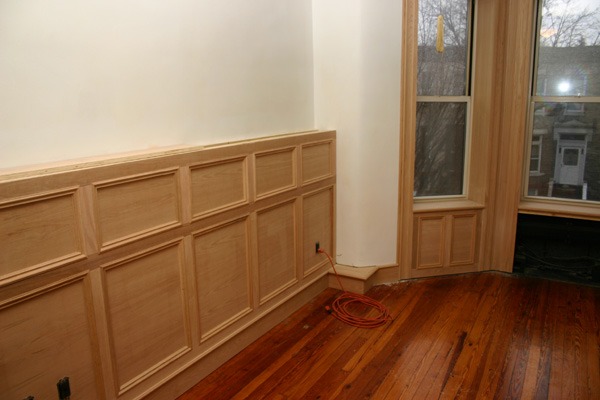
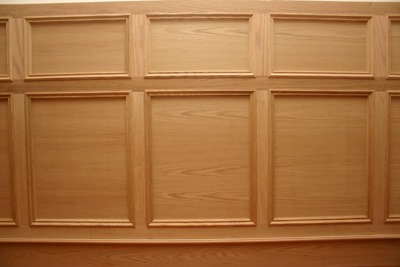
Anyway, here’s the result. I think it made those rather dull panels pop! It’s a bit more formal than I was originally going for but as Kathy commented on the blog, I’d never be happy with the plain, square-edged paneling. Here is what it looked like before the bolection moulding.
And here’s a view towards the bay window.
… and finally a little fisheye of just the panels.
And, now, on to the shelf for the top of that tall wainscotting. I was going to do this with plywood but decided to do it in solid oak instead, mainly because I’m too lazy to make a trip to the lumberyard.
I also found the radiator vents I needed for the center panel at Atlanta Supply. I just have to modify it because it’s an angled baseboard vent. I was originally looking for a decorative cast iron vent but I couldn’t find anything in the size I needed that also didn’t cost as much as the radiator.
This blog is about the challenges of renovating an old (1903) Brooklyn, New York row house.
My last major renovation project was the master bedroom, most of which is about finish carpentry. You’ll find other completed home improvement projects in the Projects submenu at the top of this page.
I’m not a professional builder and don’t pretend to be. I’m just an experienced amateur raised in a family of committed DIYers. I try to closely follow local and national building codes but don’t mistake anything on this site to be professional or even accurate advice! Your mileage may and definitely will vary.
This is the third iteration of BrooklynRowHouse.com, from scratch-built to Drupal and now Wordpress. I hope you enjoy your time here.