My dogs are killing my floors! They’re large and energetic pups who like to use the floor as a skating rink. I decided to look in my photo archives to see what they look like now as opposed to five years ago.
Thankfully, it wasn’t as bad as I thought but I’ll probably get the floors lightly sanded and refinished when I’m done with the construction here and the dogs are a little older and more sedate. One of the reasons I don’t stain floors is so I have the option to screen them if they need refinishing rather than having to do a thorough sanding.
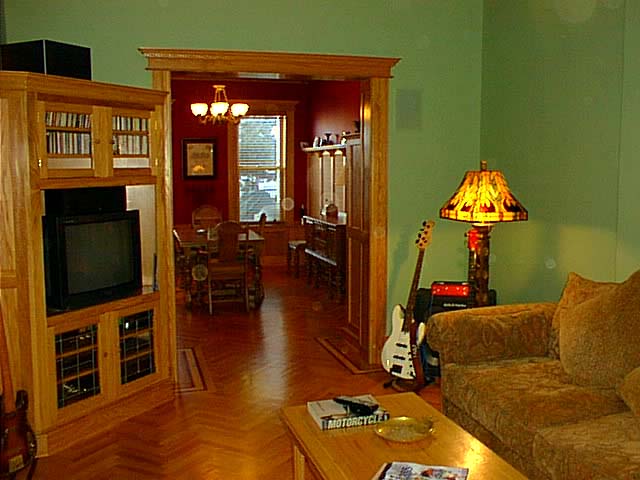
While looking for those old photos I got sidetracked by a few pix of the nearly completed media cabinet I had built for the living room. This project started as an afterthought. Because the living room isn’t huge, I had originally planned to stash most of my media hardware in a basement locker. It was a poorly conceived idea.
The location of the cabinet was dictated by the layout of the room. It was going to have to be a corner cabinet. But I piled on a few more requirements. It had to hide all my audio and video gear as well as my favorite 300 or so CDs. Even though I didn’t own one yet, it had to support a 38″ wide HD monitor. There would be no visible wiring and there would be a hardwired Ethernet connection. It had to blend into the finish trim style of the room, which meant that it had to be a built-in.
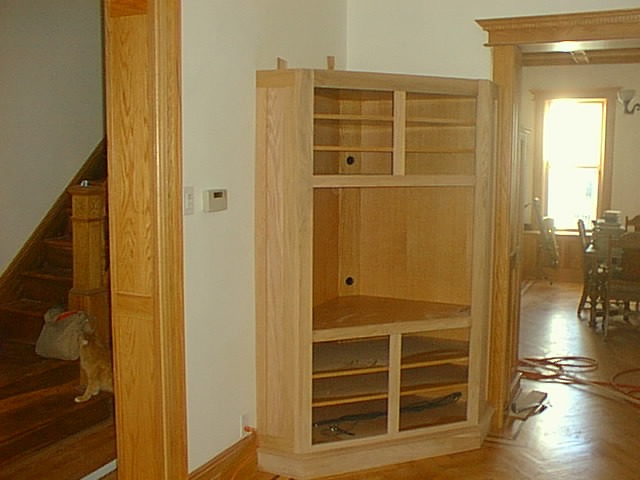
This unfortunately also meant that it needed to be a five-sided cabinet and I’d never built anything like this before. Worse, to get the correct TV viewing angle from the sofa, the front had to be a sixty degree angle off the left wall. So the cabinet had to be irregularly shaped. More good news: in order to hide all the cables I needed a wiring channel in the back. So that meant a six-sided cabinet. The geometry was making my head explode.
 The first thing I had to do was eliminate a major unknown: the practical dimensions of that flat screen monitor. I spent an evening with a tape measure at Best Buy and Circuit City before nailing down those numbers. I tried mocking up the cabinet in a CAD program but I couldn’t get a handle on the software. In the end, I just hacked away on a piece of scrap masonite until I got a horizontal profile that worked. Then I ordered several sheets of 3/4″ red oak plywood.
Ever since a friend of mine built a beautiful bar in his shop which was too large to ever leave his shop, I’ve always been afraid of the “boat in a basement” syndrome. Unlike our Fearless Leader, I always plan around an exit strategy. In this case, the exit was a 36″ wide door from my shop through the garage. The strategy was that I could only build the rear three sides in the shop. It would have to be assembled in place, over those aforementioned newly finished floors.
I wasn’t sure how strong I could make a six-sided cabinet either. All of my experience was constructing standard cabinets using standard bar clamps, which wouldn’t work very well here with the mix of angles. The clamping solution was nylon ratcheting tiedowns that I use for trailering the motorcycles. To increase the strength of the joints I used Gorilla glue. After my neighbor, Joe, and I hauled the three-sided back up from the shop, I constructed the other sides as individual units resting on a common base.
 The face frame went on last, after the seven shelves were slid into their respective dados. In the end, making that template out of masonite was a life saver because it gave me a common reference for cutting all the shelves, the base and the top.
Anyway, this was (almost) the finished project. I still need to build stained glass inserts for the upper cabinet. The bottom one uses translucent colored stained glass around the edges and clear glass in the middle so the infrared remotes will work.
The wiring is all hidden. The receiver/amp is a seven channel Denon AVR-1912 pushing a pair of Polk Audio RC85i in-wall speakers, a Polk center channel midrange driver, a Polk subwoofer (located on top of the cabinet) and a pair of Polk bookshelf speakers in the dining room. Yes, I love Polk Audio speakers. There are two more pairs of speaker wire looped and stored in the basement ceiling for future expansion. One is intended for my back yard next spring.
I come from a pro audio background and was skeptical that I could get the audio quality I wanted from in-wall speakers. So it was a pleasant surprise when they wound up sounding great. I insulated around them to eliminate the muddy, booming effect that in-wall speakers often have. Not only do the Polks sound great, the stereo separation is amazing.
But I still need to get that LCD/plasma/whatever monitor. Fact is though, I never use the living room except for bass practice.
MUCH, MUCH LATER…
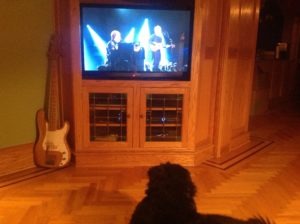 Here’s a shot of the nearly-completed cabinet with my Panasonic flat screen TV. That’s my belated Jack watching an Elton John concert. The stained glass panels for the lower cabinet is done but I’ve still got to build a couple of stained glass panels for the upper cabinet doors.
There were some other additions. One is a Unifi access point for my downstairs wi-fi. There’s also a four channel stereo speaker selector switch for my “B” output on the Denon amp.
It also gets very warm inside that cabinet so I bought a pair of red oak vents for behind the monitor. I’ve also got streaming audio working through the Denon through a convoluted recipe of Apple Airplay, an Airfoil app running on my Mac Pro in the office and a selectable source of Spotify, Youtube Music and Tidal, which also lets me control the programming via a mobile app.
![]()