I have several stained glass tasks in the queue here. Some, like the upper cabinet doors in the living room media cabinet, have been on hold since 2003. Others, like the funky stairway skylight, I’ve wanted to replace since the day I first saw the place.
While stained glass construction is fairly mechanical and basically just woodworking joinery using glass and lead came, the design, templating and piecing out can be very time consuming. Most of the glass I’ve done here is fairly simple and angular to match the existing stained glass. But I wanted something a bit more ornamental for these new projects.
The delay is mostly because I suck at drawing. I can muddle my way through Photoshop if I have to and I’ve even built a few nice web page banners using “creative appropriation” of assets conceived by others. Change a few lines, overlay a mask or two, morph a few elements and, poof, it’s mine. Derivative art.
While a Photoshop geek might be able to design stained glass using it, I ain’t one of them. So I plonked down a considerable chunk of money for professional stained glass design software from Dragonfly, Glass Eye 2000. This software does everything but cut the glass for you. While it’s expensive, it’s less than I would pay to have just one of these projects professionally made. I’ll talk more about Glass Eye in a future installment.
Back to the project, up first are two pairs of doors for the master bedroom, technically the last piece of the long-running master bedroom renovations. One pair is for the bedroom cabinet I built last year and the other is for a window from the bedroom into the hallway. The latter was a redundant doorway after I had merged two bedrooms into one. I decided to put a window in that opening to bring natural light into what would otherwise be a dark section of hallway.
Measurements done, the first thing I have to do is construct empty frames for those doors. It will be made from red oak (of course) — standard 1″ stock ripped to 2-1/2″. For all practical purposes, I’ll be constructing them like a raised panel cabinet door. But instead of a raised wood panel I’ll use a fabricated stained glass panel. There’s a bit more to it than that, but later for that as well.
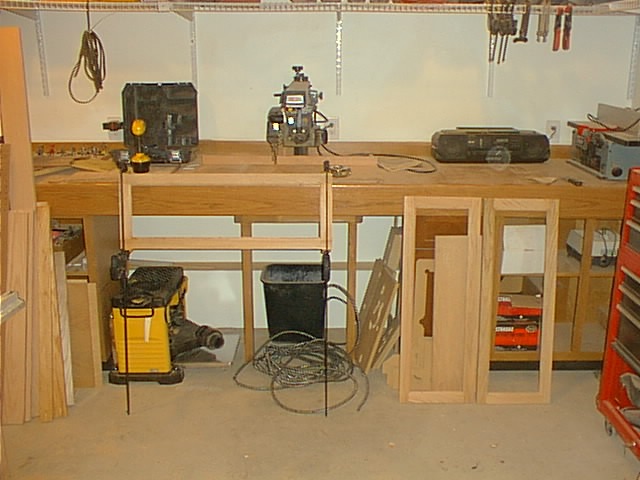
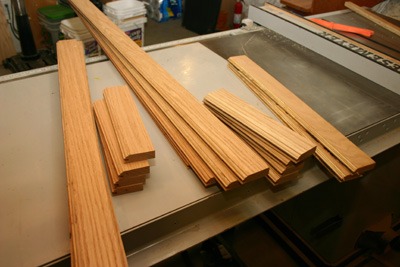
 So it’s downstairs to the shop to make the blanks for those doors. These were ripped from a couple of 1x6s I picked up at Lowes last summer. I wanted to give them a few months to season in the shop to make sure there weren’t going to be any issues with twisting or warping. Believe it or not, the Brooklyn Lowes carries nicer red oak stock than our local hardwood yards. The boards were run through a surface planer to make sure they were of identical thickness. This is an important step for rail and stile construction. Then it was on to the chop saw to cut for length, then the table saw to rip it to width.
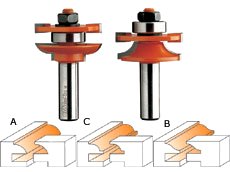 After the blanks were cut it was on to the router table. Paneled cabinet doors usually employ two stiles (the vertical perimeter members) and two rails (the horizontal members). Sometimes those rails and stiles have architectural beading. This is achieved by two bits, appropriately called a rail and stile set.
Why two bits? After all, cabinet beading looks like it could be done with just one. The second bit cuts a negative profile of the first bit. It’s used on the ends of the rails so they can fit snugly inside the stiles, something like a tenon. It creates a large glue surface and a very strong corner.
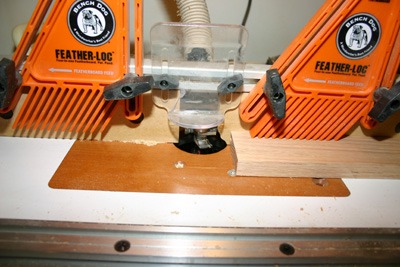 The trick with rail and stile sets is making sure that they (a) cut a deep enough recess for the panel and (b) they’re aligned to each other. What I do is rip several pieces of scrap plywood and use them to set the router depth. While experience and eyeballing will get you in the ballpark, it’s still pretty much of a trial and error process. Needless to say, when you’ve got the router adjusted for a bit you should make all your cuts that use that bit.
A few more tricks:
- It can be tough to visualize the profile that a complex router bit will cut so label your bits with a Sharpie. I have my rail/stile bits labeled, “Lateral”/”End”. I have three rail/stile sets so I’ve also got them color coded.
- Make cabinet doors about 1/8″ over-sized in both planes. A little trim on the table saw will gives you a smooth joint. This can also save your butt in case you slip up and build the doors slightly out of square (eh, it happens).
- It’s almost unavoidable that there will be some tear-out from the end grain bit. You can mitigate this by doing your end cuts first, working slowly and keeping the router RPMs high. But if it happens, don’t worry about it. You can trim off the “hair” later with a utility knife.
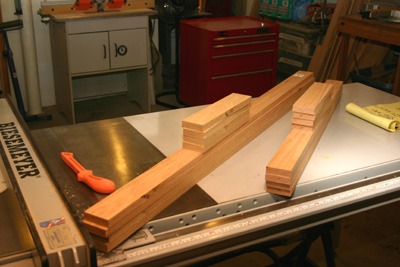
 Here are the blanks with the lateral cuts.
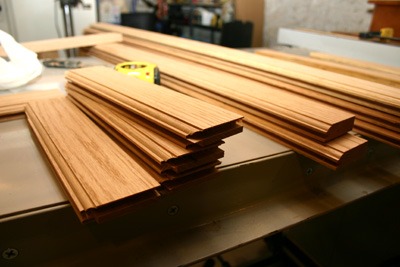 Here they are with the end cuts.
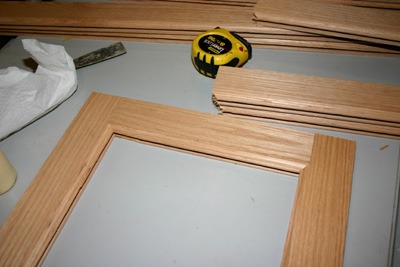 And here’s a dry fit of the joints.
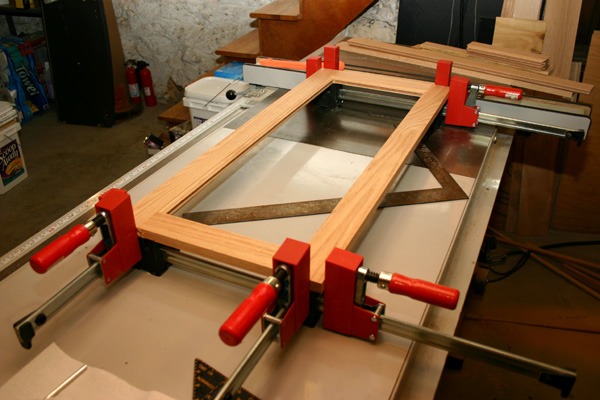 Finally, here’s the assembly. I like to use Bessey K-Clamps for things like this because adjusting tension on the clamps helps bring the fabrication into square. You can test for square by measuring diagonal corners but on smaller assemblies like this I prefer to use a rafting square. I wish I had more room in the shop for a real assembly table. But then I’d probably want a hydraulic clamping system.
“HEY! You forgot to put in the panel, dummy!”
As I said, this is a little different than building a raised panel door. The problem is that while the edge channel on the stained glass panel will just fit into the 3/16″ wide dado left by the router bit for the raised panel, once I solder it it won’t. I’ll have to whack out the thin backing lip with a chisel to insert the panel, then add a moulding detail to hold it in place. This actually works out better because the panel can be removed for repair later.
I have one more set of cabinet doors to make with a different beading and a frame for the bathroom skylight. My next post will probably be about the Glass Works design software.
![]()